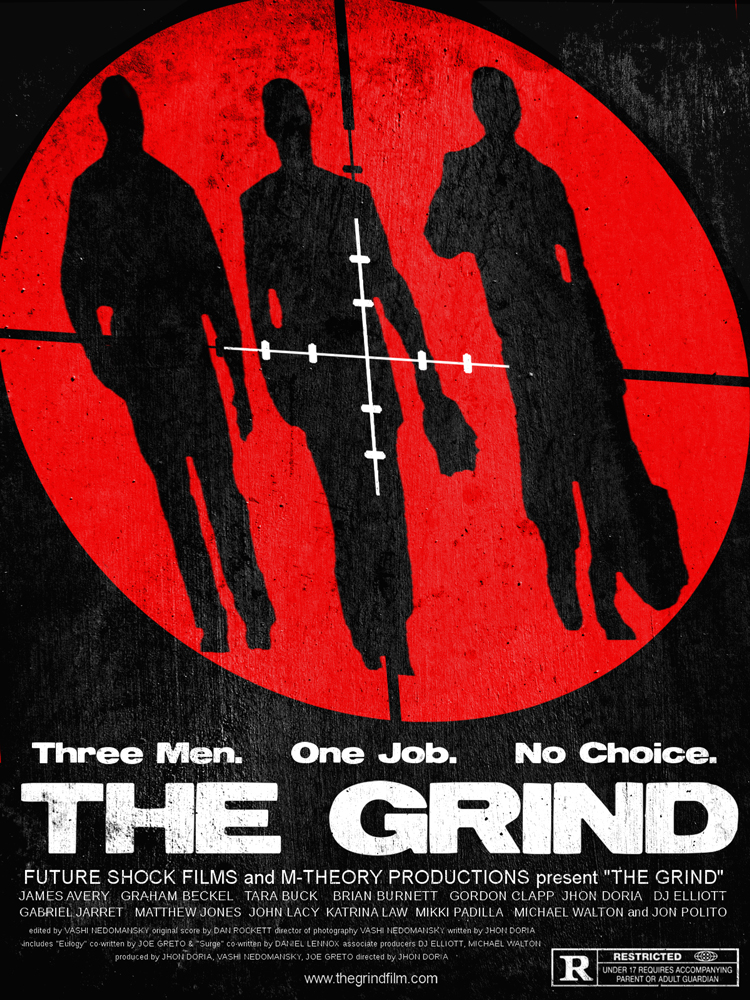
Self-funded, low budget, indie filmmaking is wonderful for the creative and artistic freedoms you are granted as you strive to tell the story and share it with others. You are the filmmaker, the studio, the investor and the distributor. This great power comes with great responsibility and heavy consequences. I’ve spent the last 5 years of my life working to finish a feature film entitled…THE GRIND. The literal and figurative irony does not go unnoticed…but it also drives me to complete my mission.
One of the famous unwritten rules in “Hollywood” is never invest your own money. I’ve broken that rule for 5 years as I’ve invested both a shit-ton of money and time to finish the film and release it to the world. My roles on this film are: executive producer, DP, editor, colorist, composer and sound mixer. I had been hired to do these jobs on previous feature films, but never all on one film.
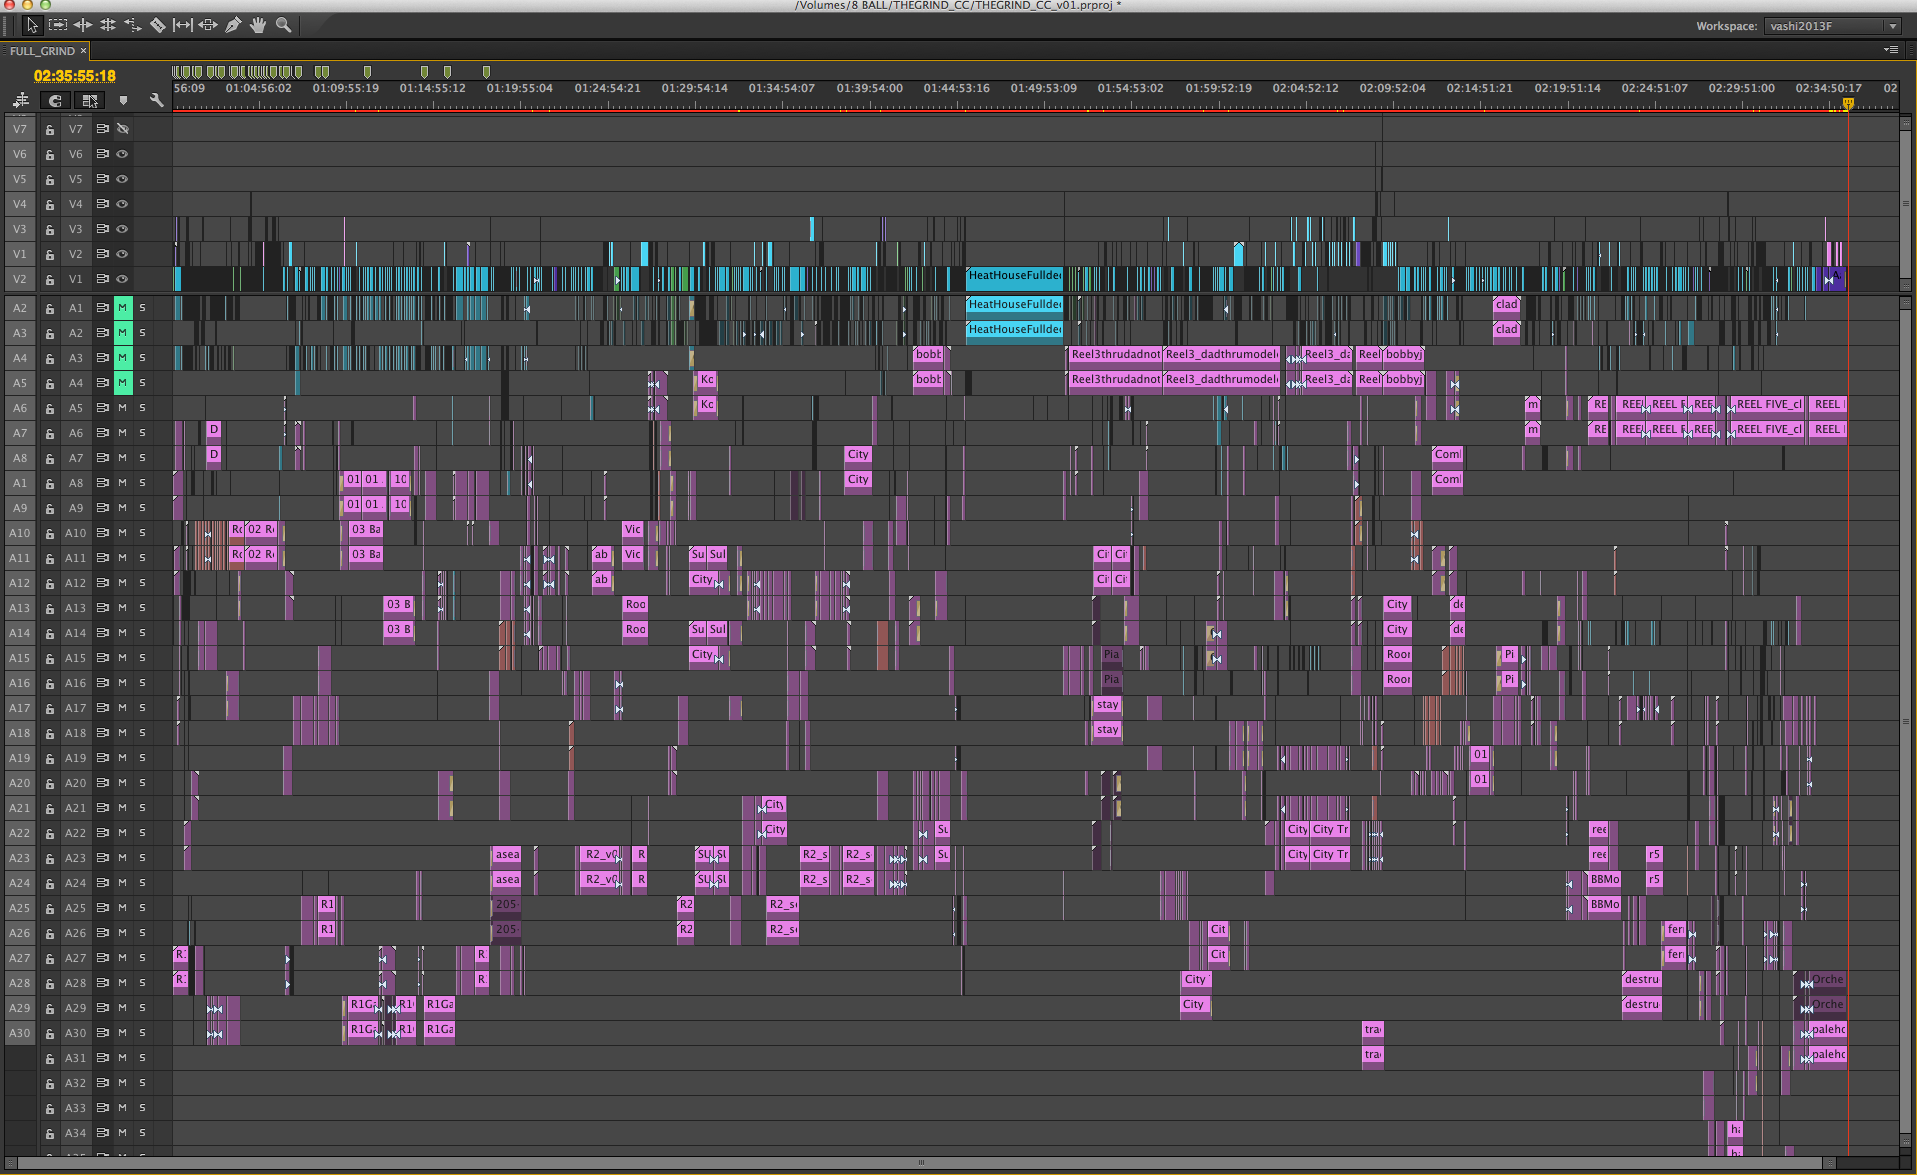
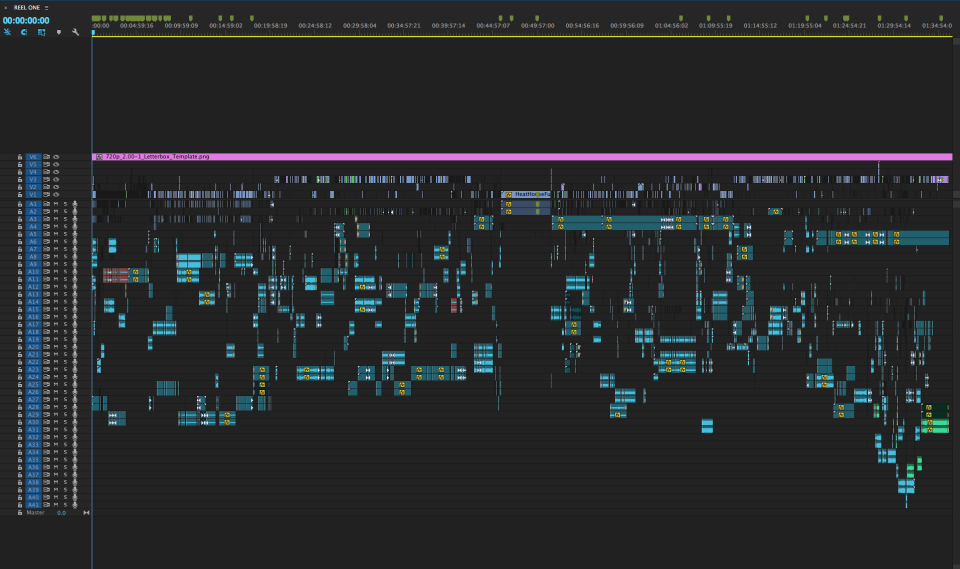
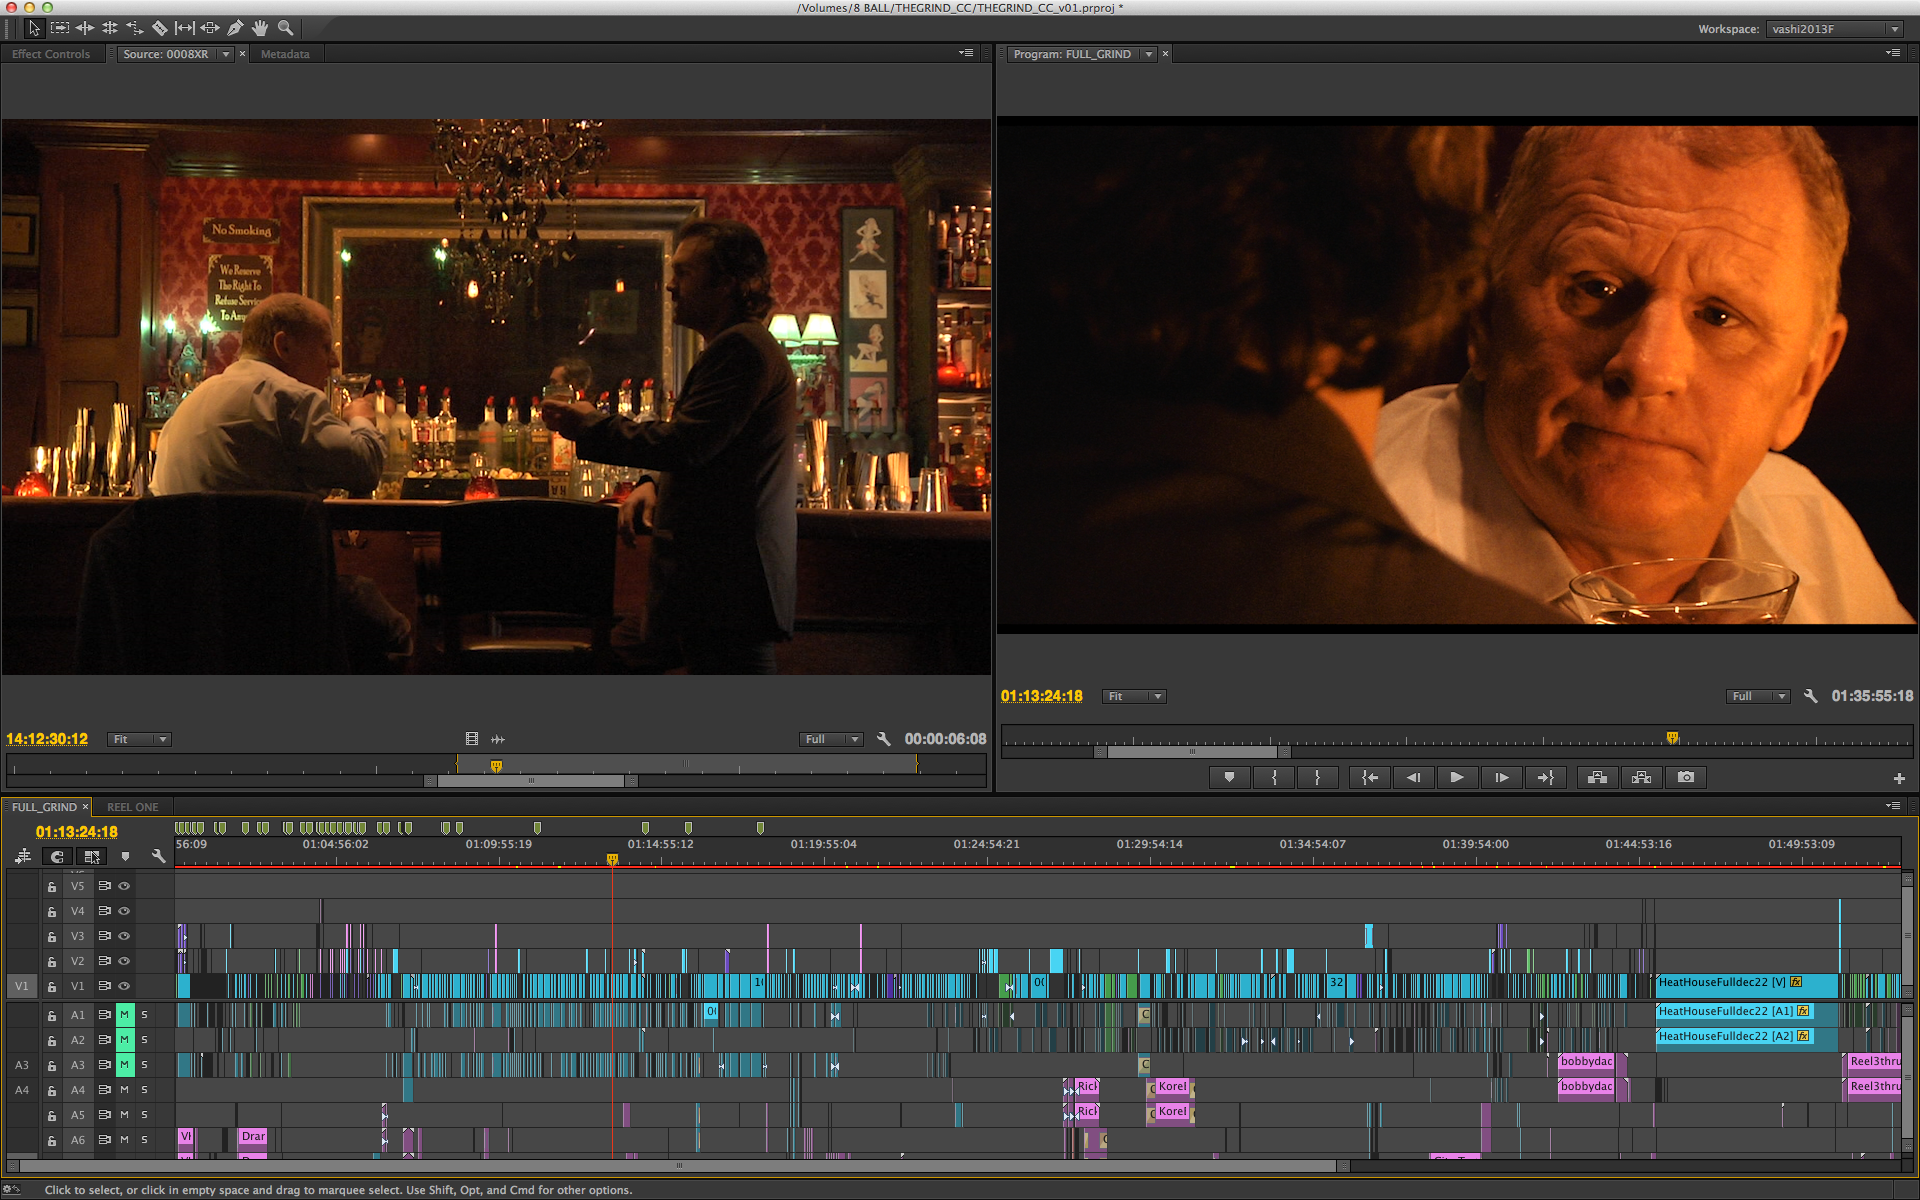
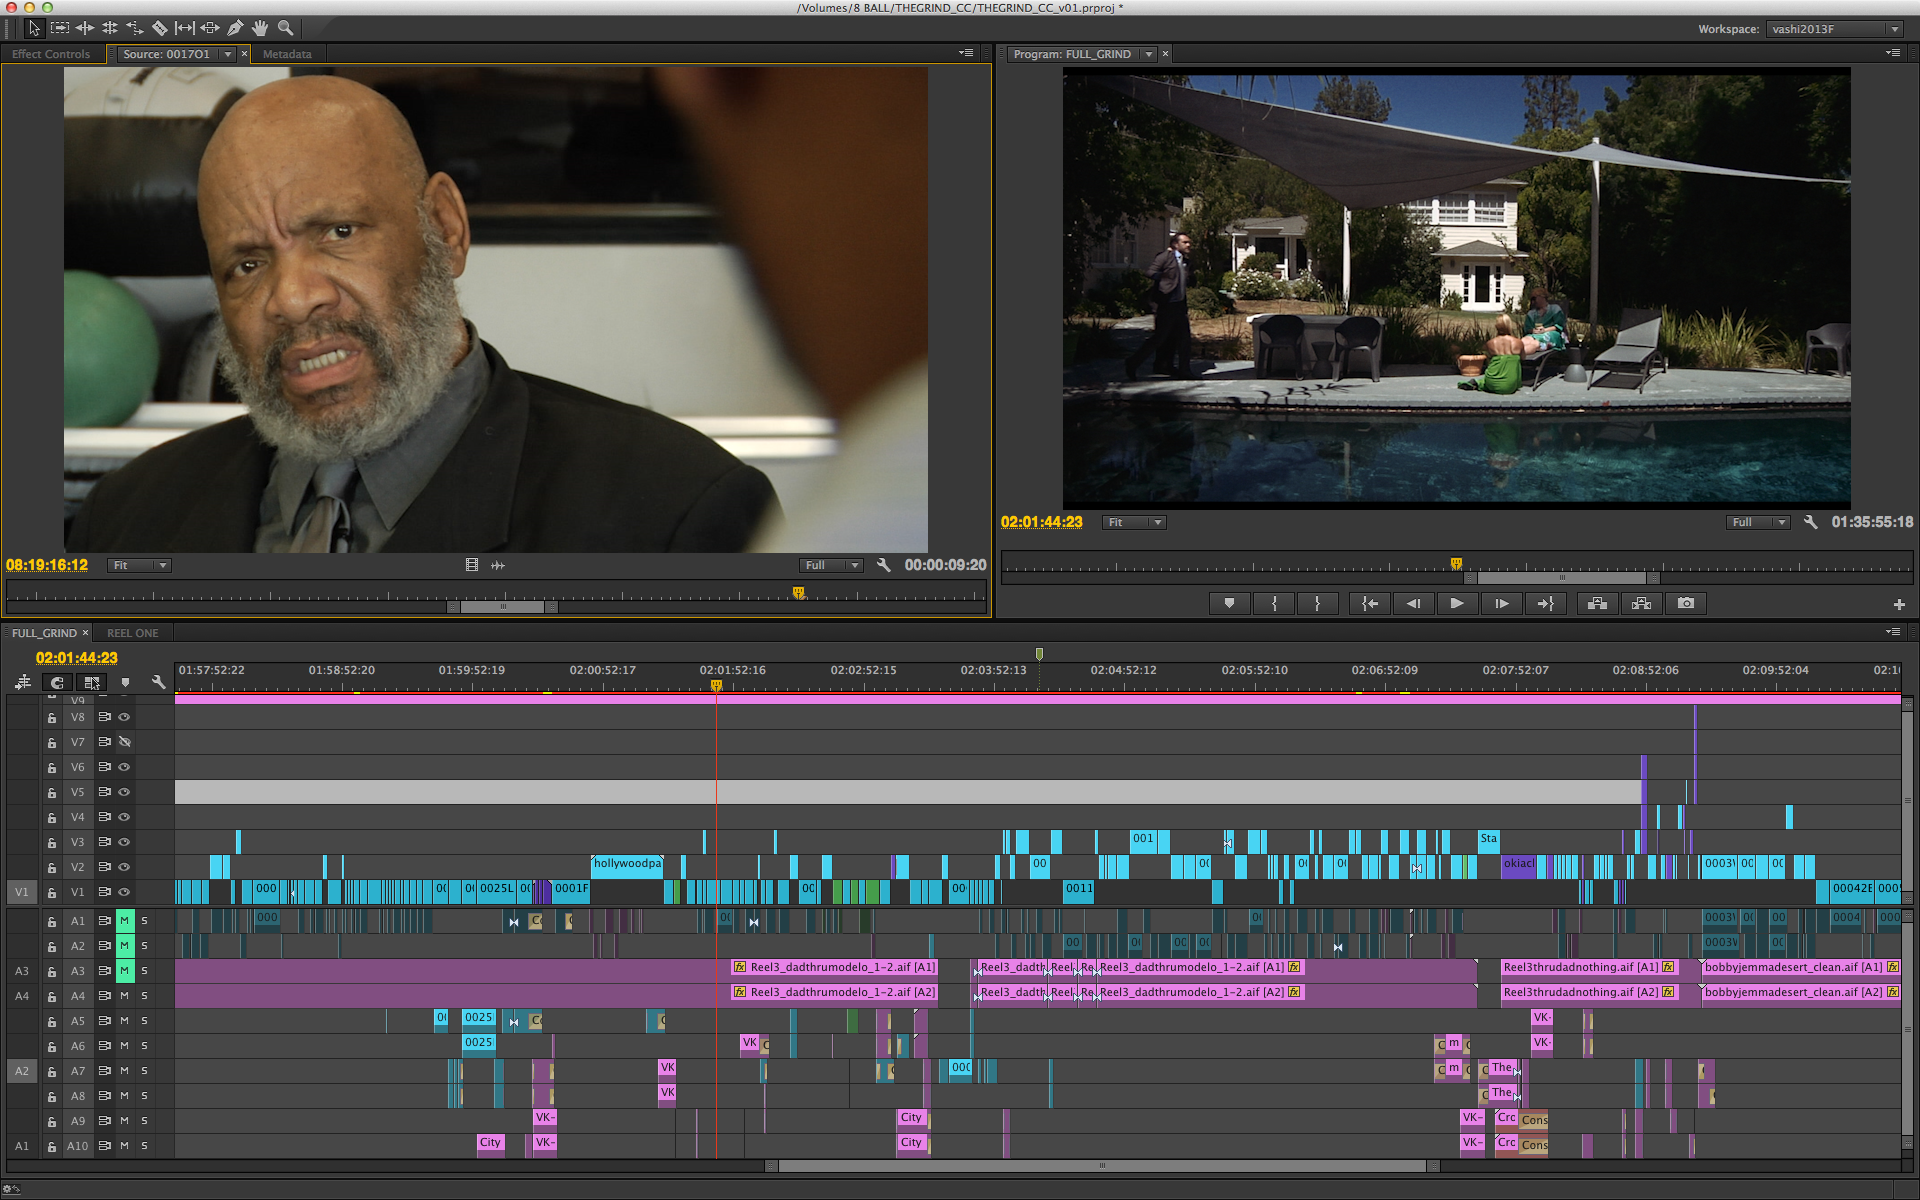
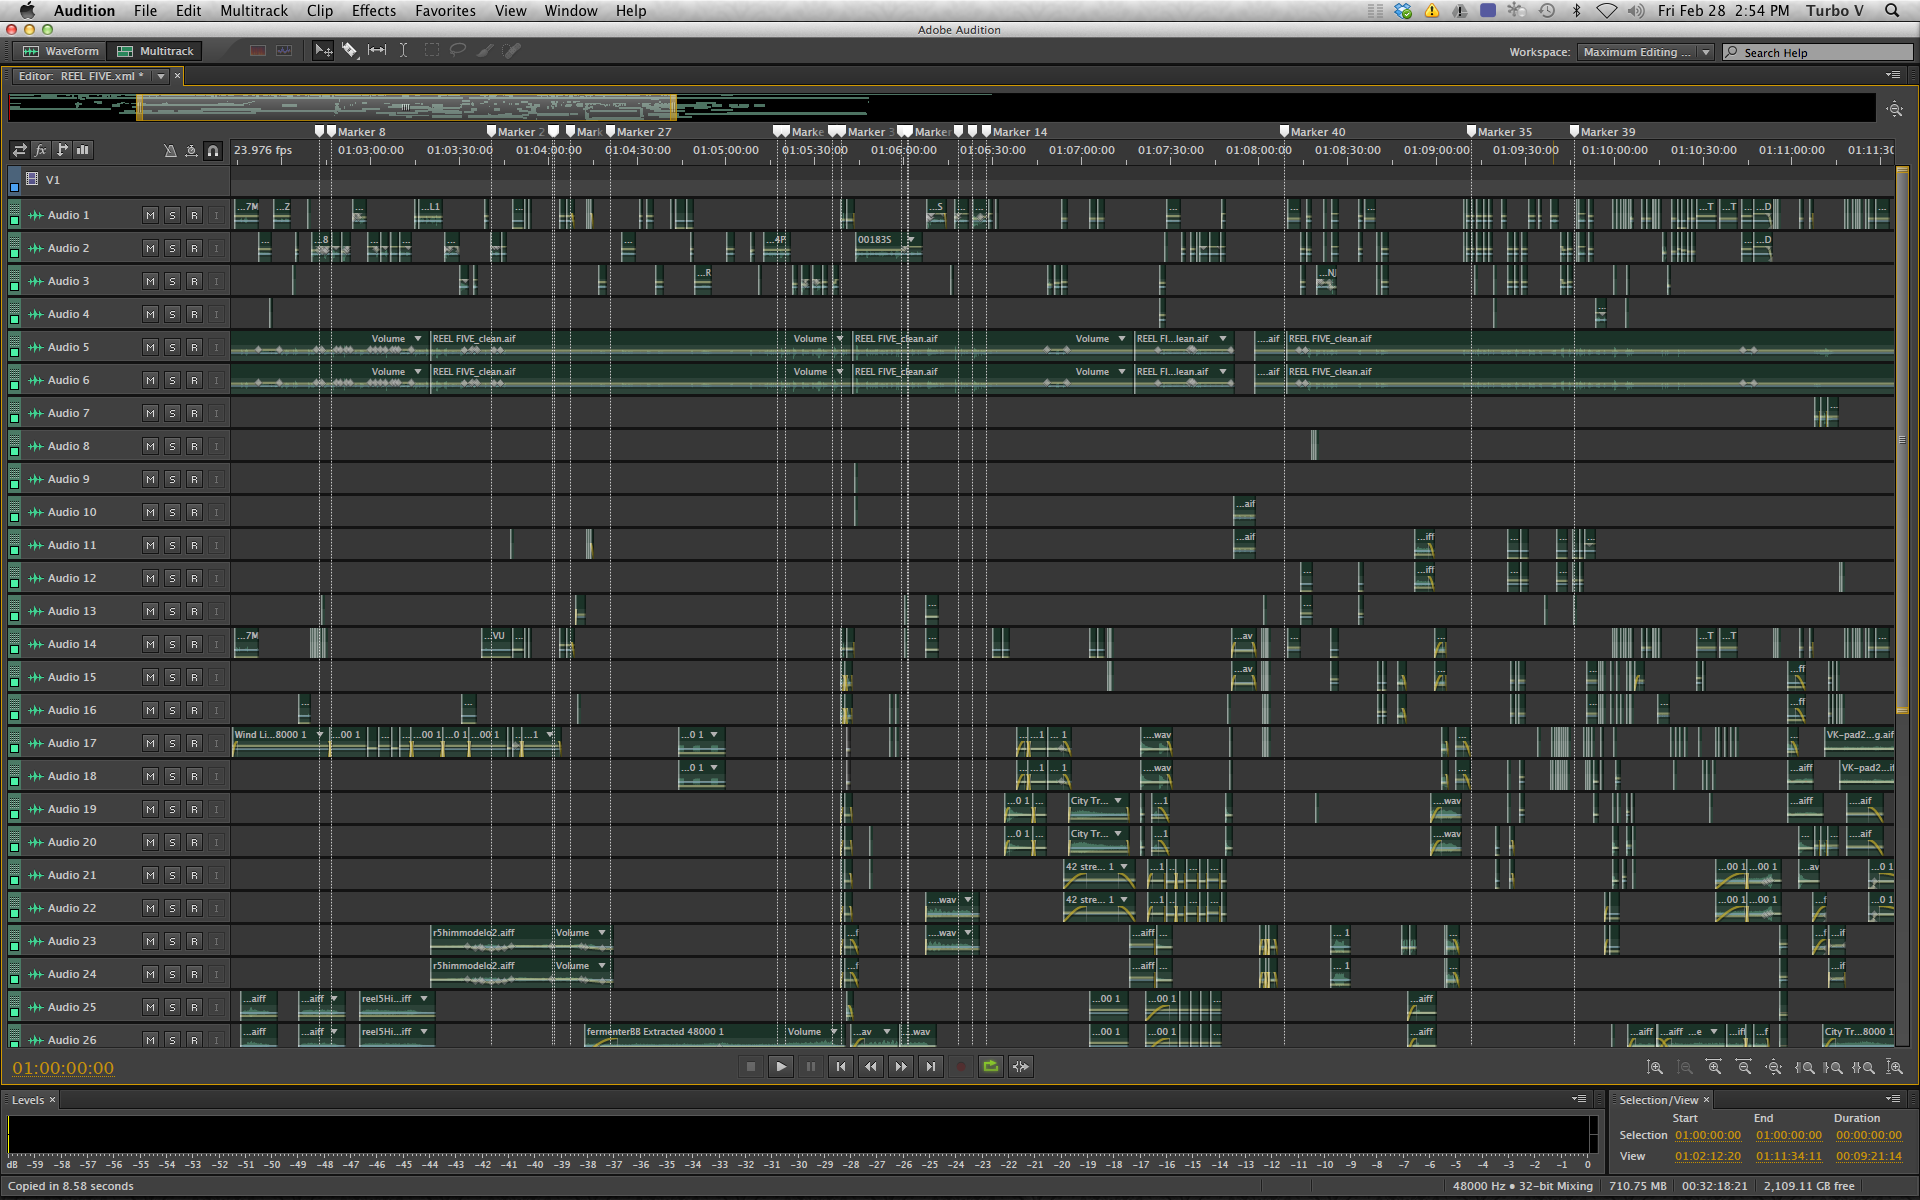
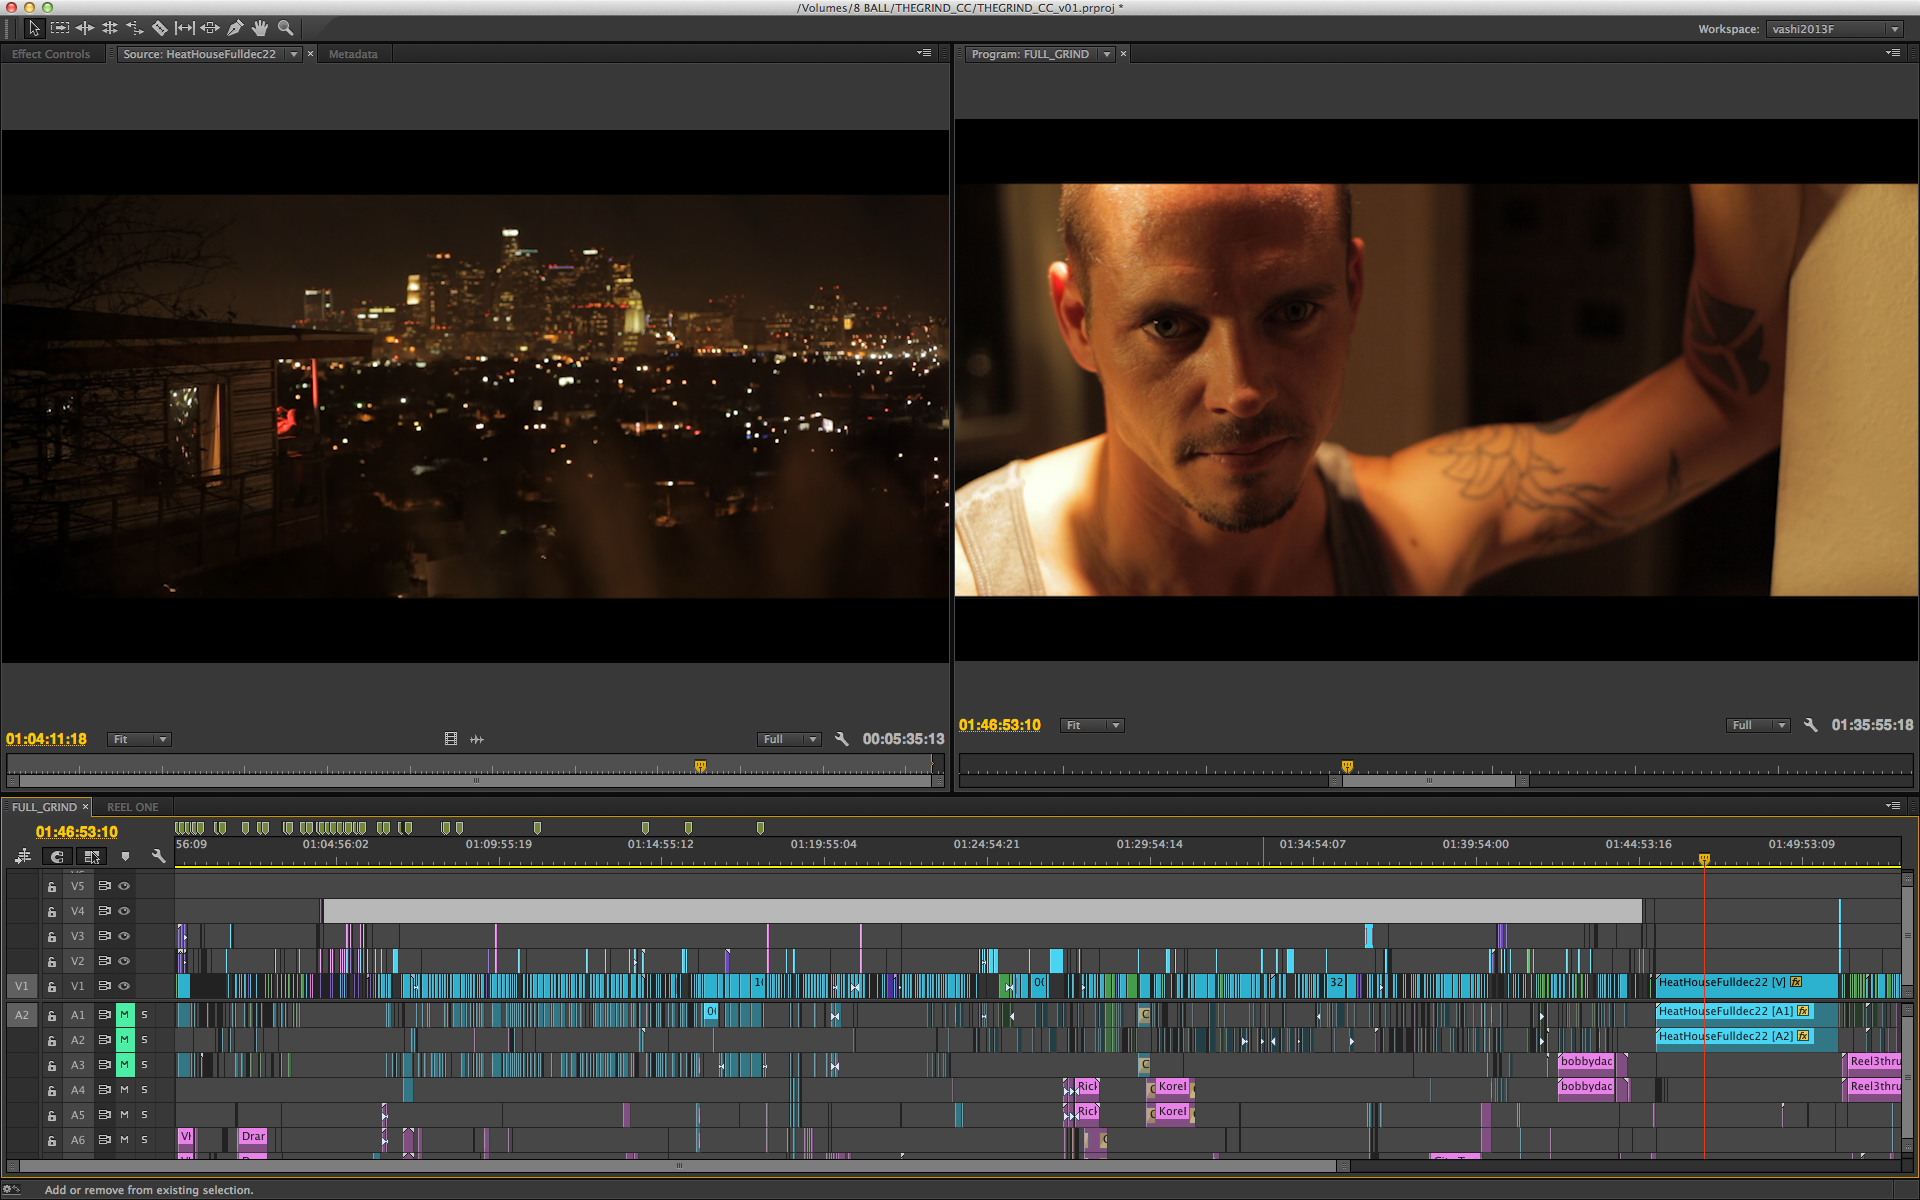
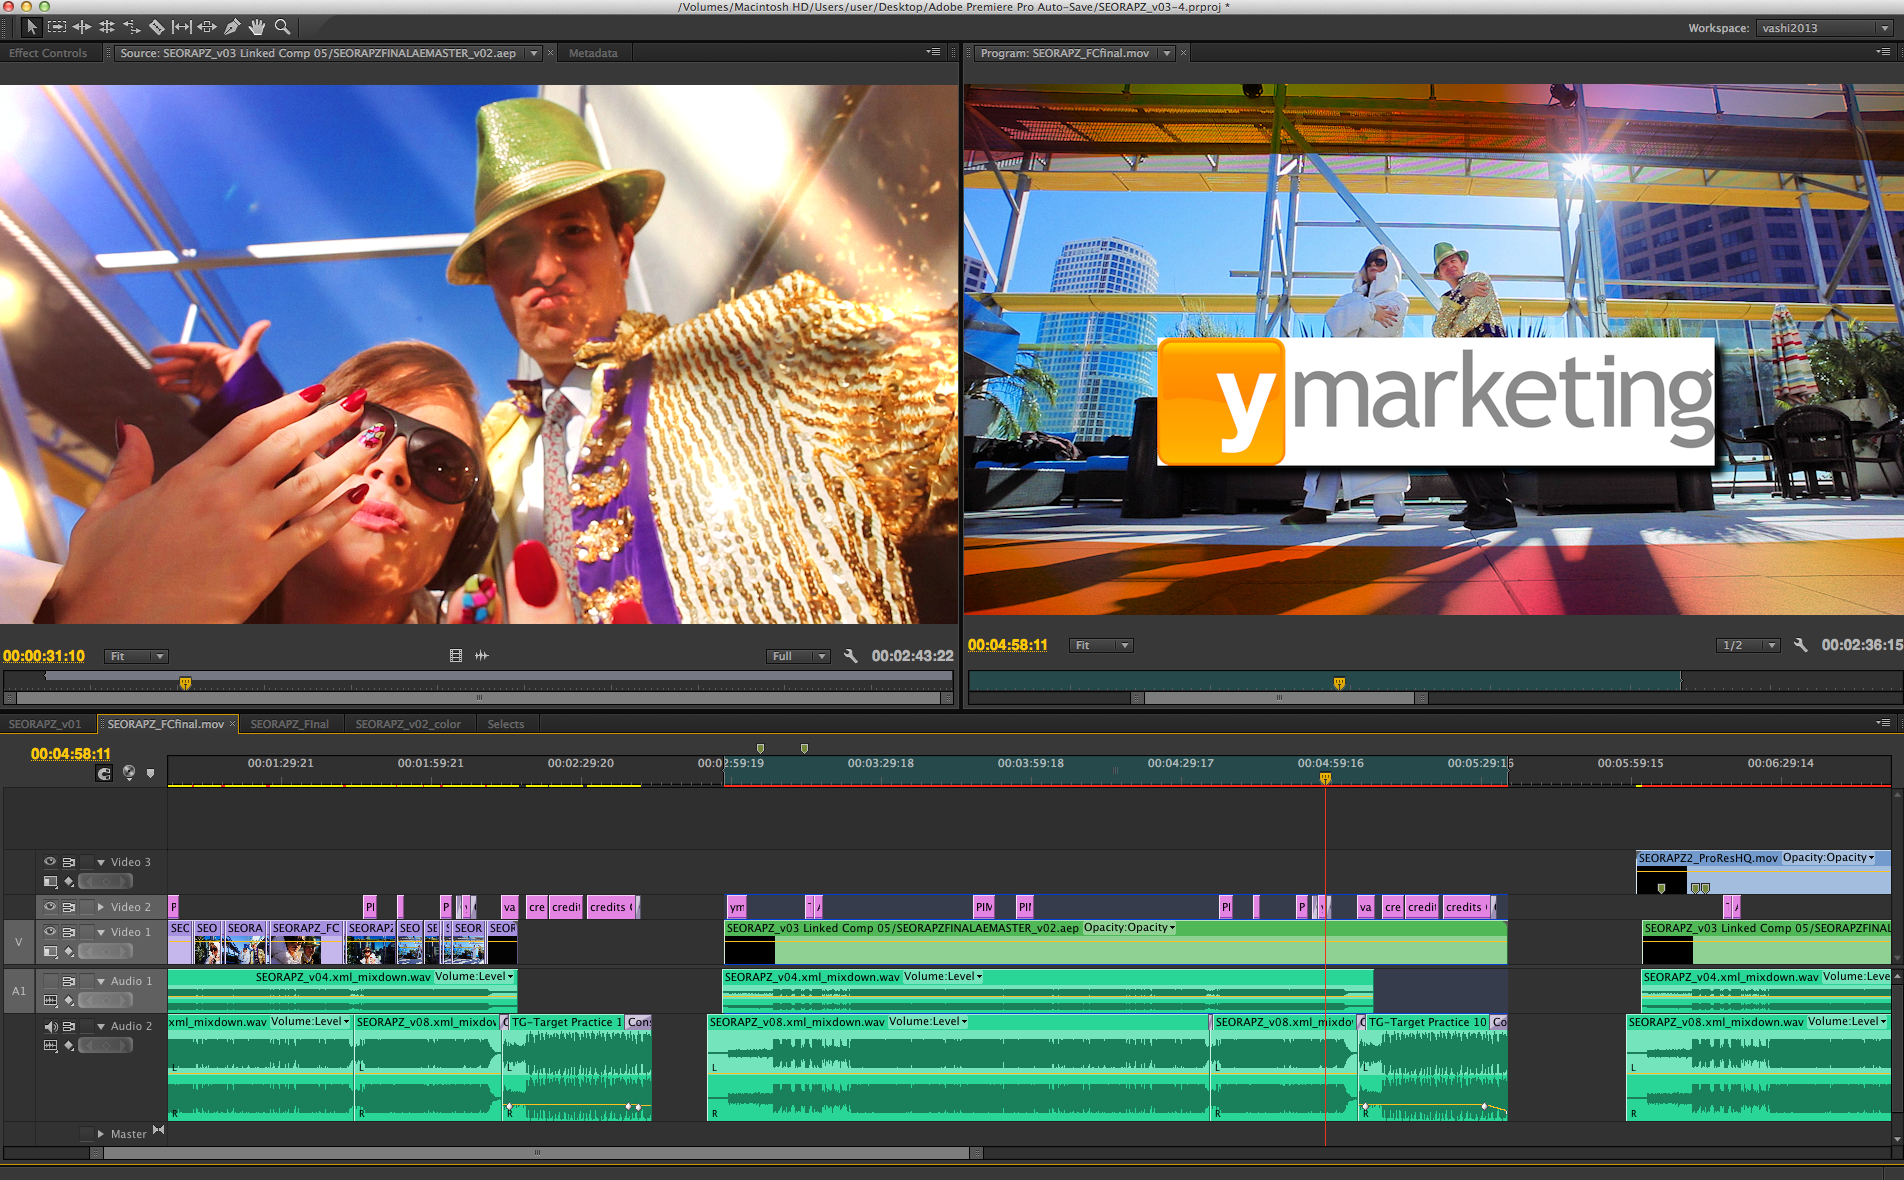
Before I dive in, here’s 5 years of editing encapsulated into one image…the final timeline.
For anyone to complete a feature film is a commendable act. The sacrifices and tolls the filmmaking process takes can bring out both the best and worst in people. The happy, easy-going movie sets often end up as filmic duds while the most cantankerous and soul-draining shoots and post productions have created some of the most memorable movies of all time. Francis Ford Coppola was allegedly fired from THE GODFATHER five times while they were shooting.
THE GRIND had a shooting schedule of 45 days spread over 6 months in late 2009. The budget was $50,000 of which I invested $45,000 into gear, locations, permits and legal fees. That was before I spent 5 years handling all of the post production. Single handed…and still going. At the same time, I’ve been cutting other feature films and working on other projects but THE GRIND consumes every free moment I have as I get closer to finishing the film.
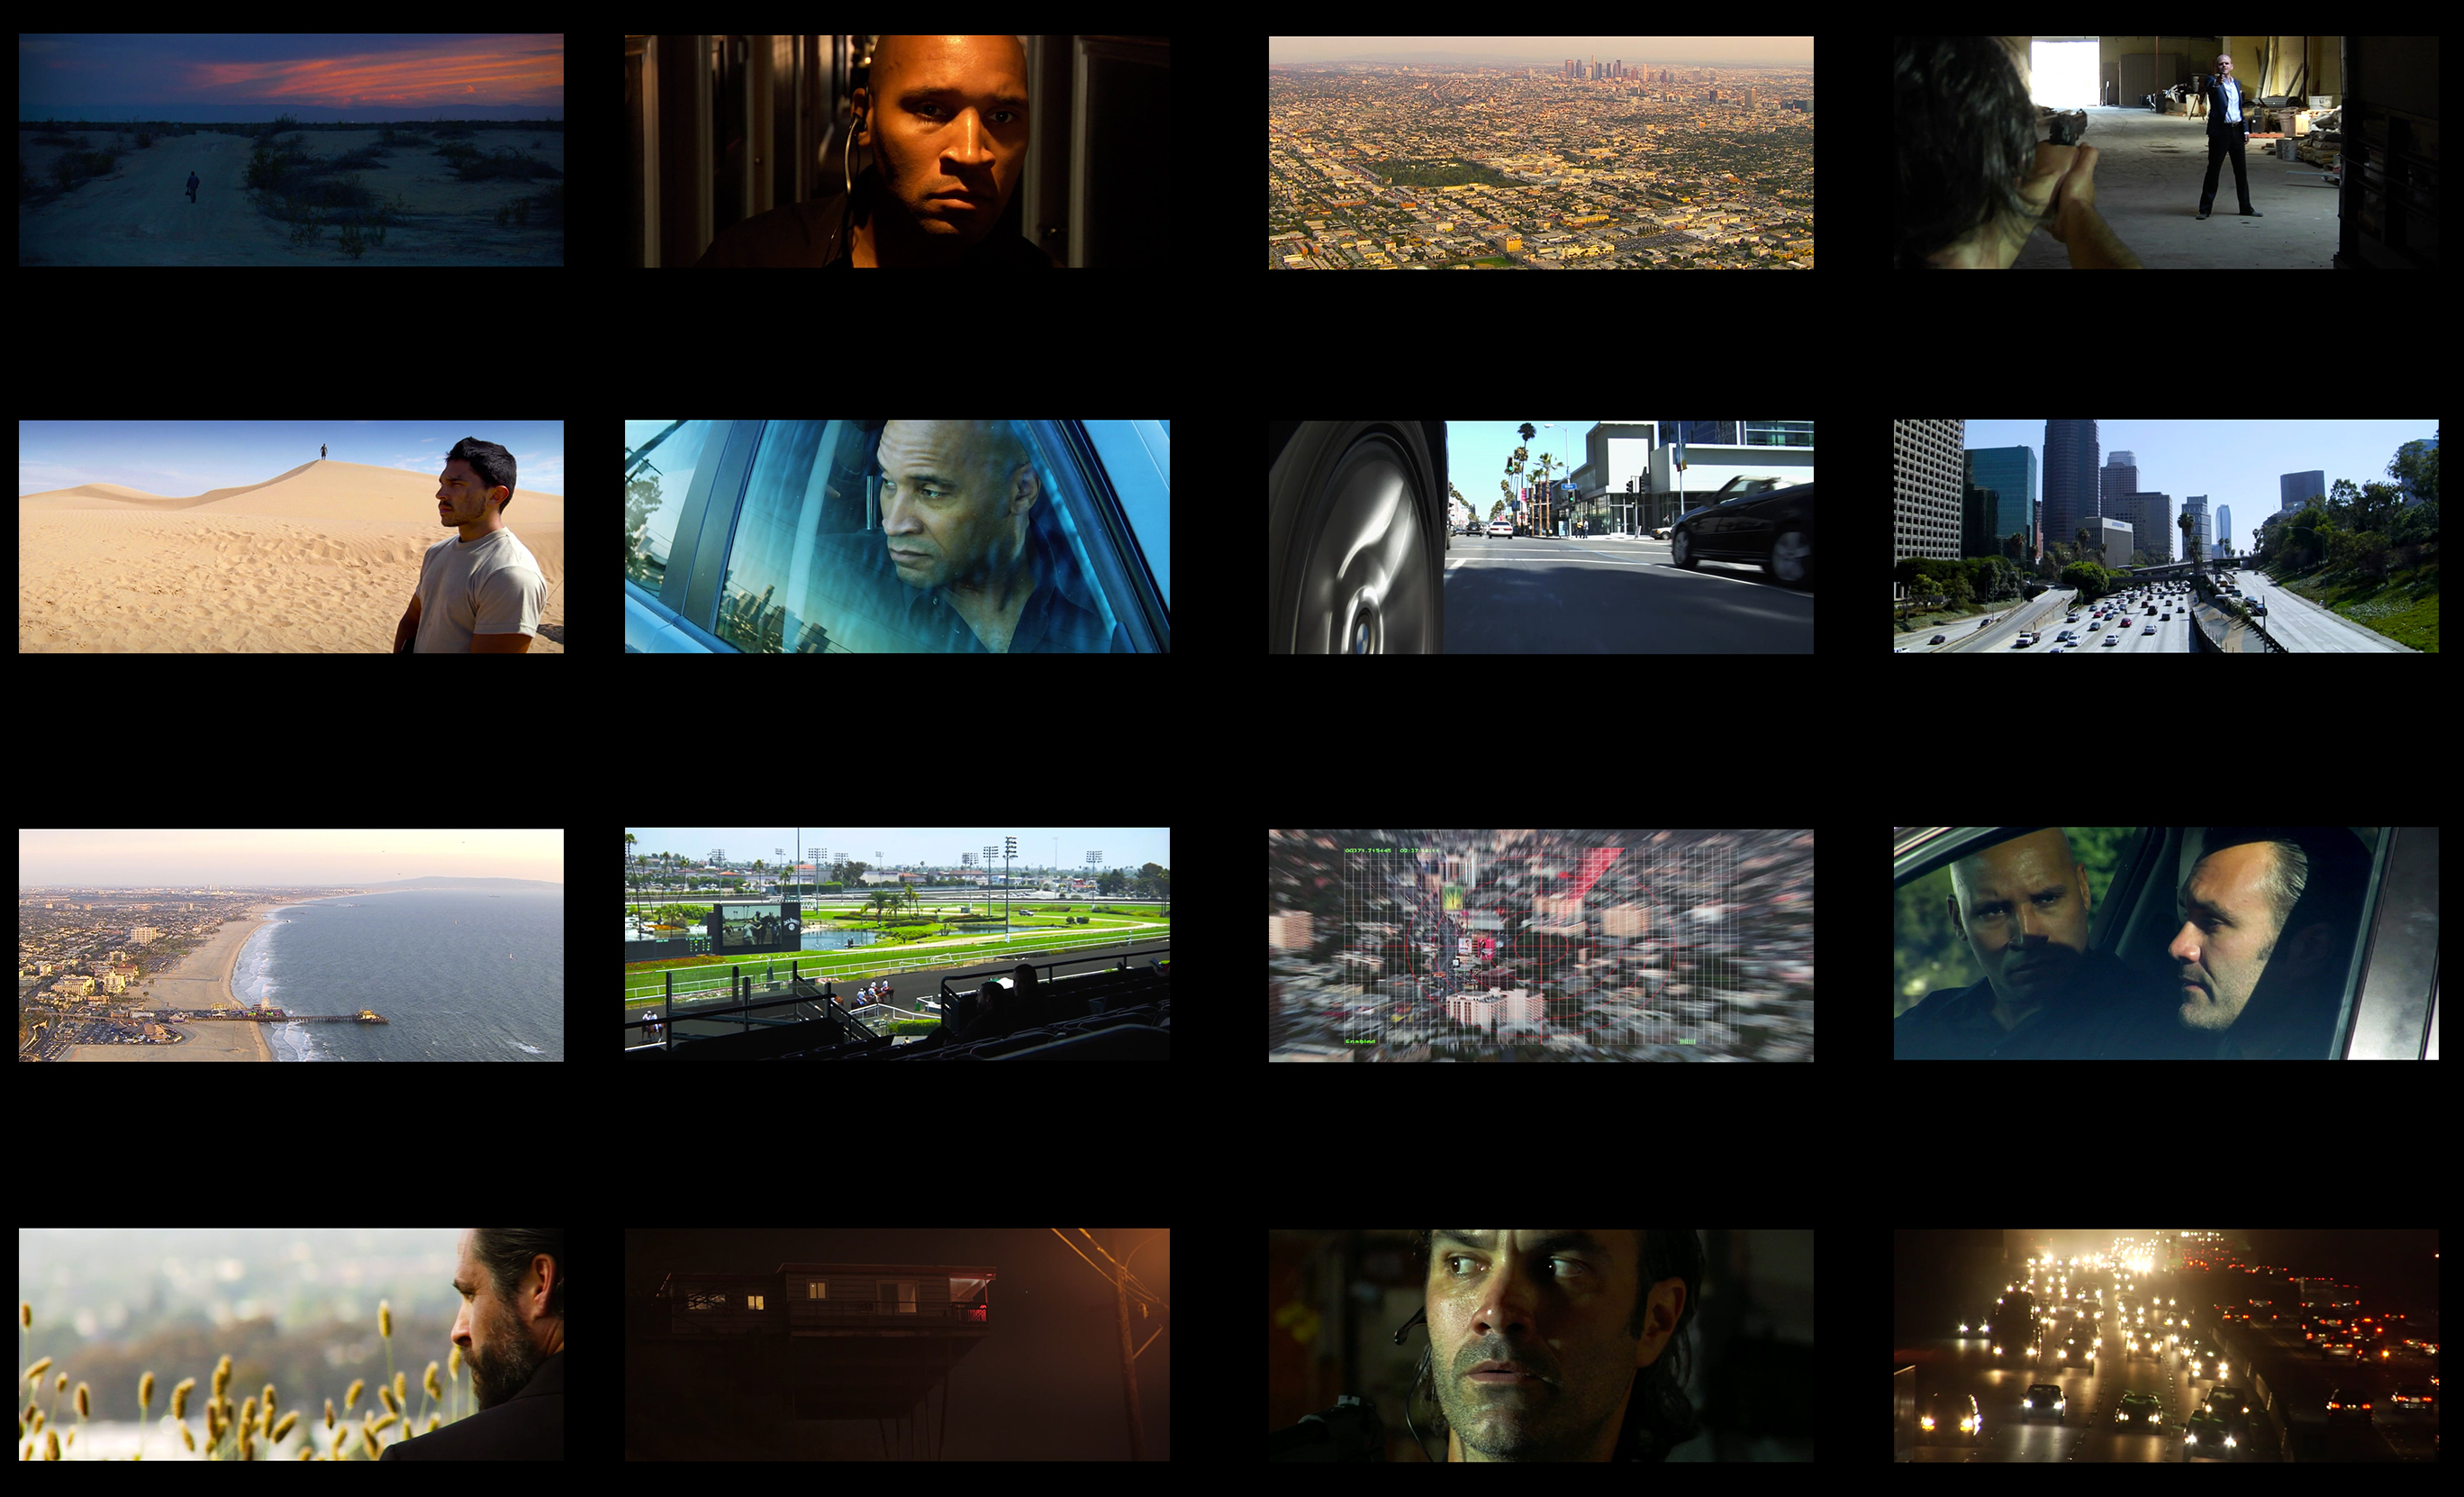
THE GRIND is a crime drama set in Los Angeles. It is the story of 3 men who have to track down and kill a man to fulfill their obligations to the mysterious boss. None of the 3 men are assassins and they have never met before the day they are to carry out this act. The film reveals the reasons and situations that forced these 3 men to accept this job against their will and then how the fateful day plays out. The script was written by the director Jhon Doria who brought on board an amazing cast. Through the strength of the script he was able to lock down some serious talent including:
James Avery (Fresh Prince of Bel-Air)
Gordon Clapp (NYPD Blue, Flags of our Fathers)
Graham Beckel (L.A. Confidential, Brokeback Mountain)
Tara Buck (True Blood, Justified)
John Lacy (Zodiac, Hitchcock)
Katrina Law (Spartacus, CSI: Miami)
Gabriel Jarret (Frost/Nixon, Apollo 13)
Jon Polito (The Big Lebowski, Miller’s Crossing)
Here are the specifics of the production and other relevant info:
45 day shoot spread out over 6 months in 2009 & 2010
All the actors worked on SAG ultra-low budget contracts
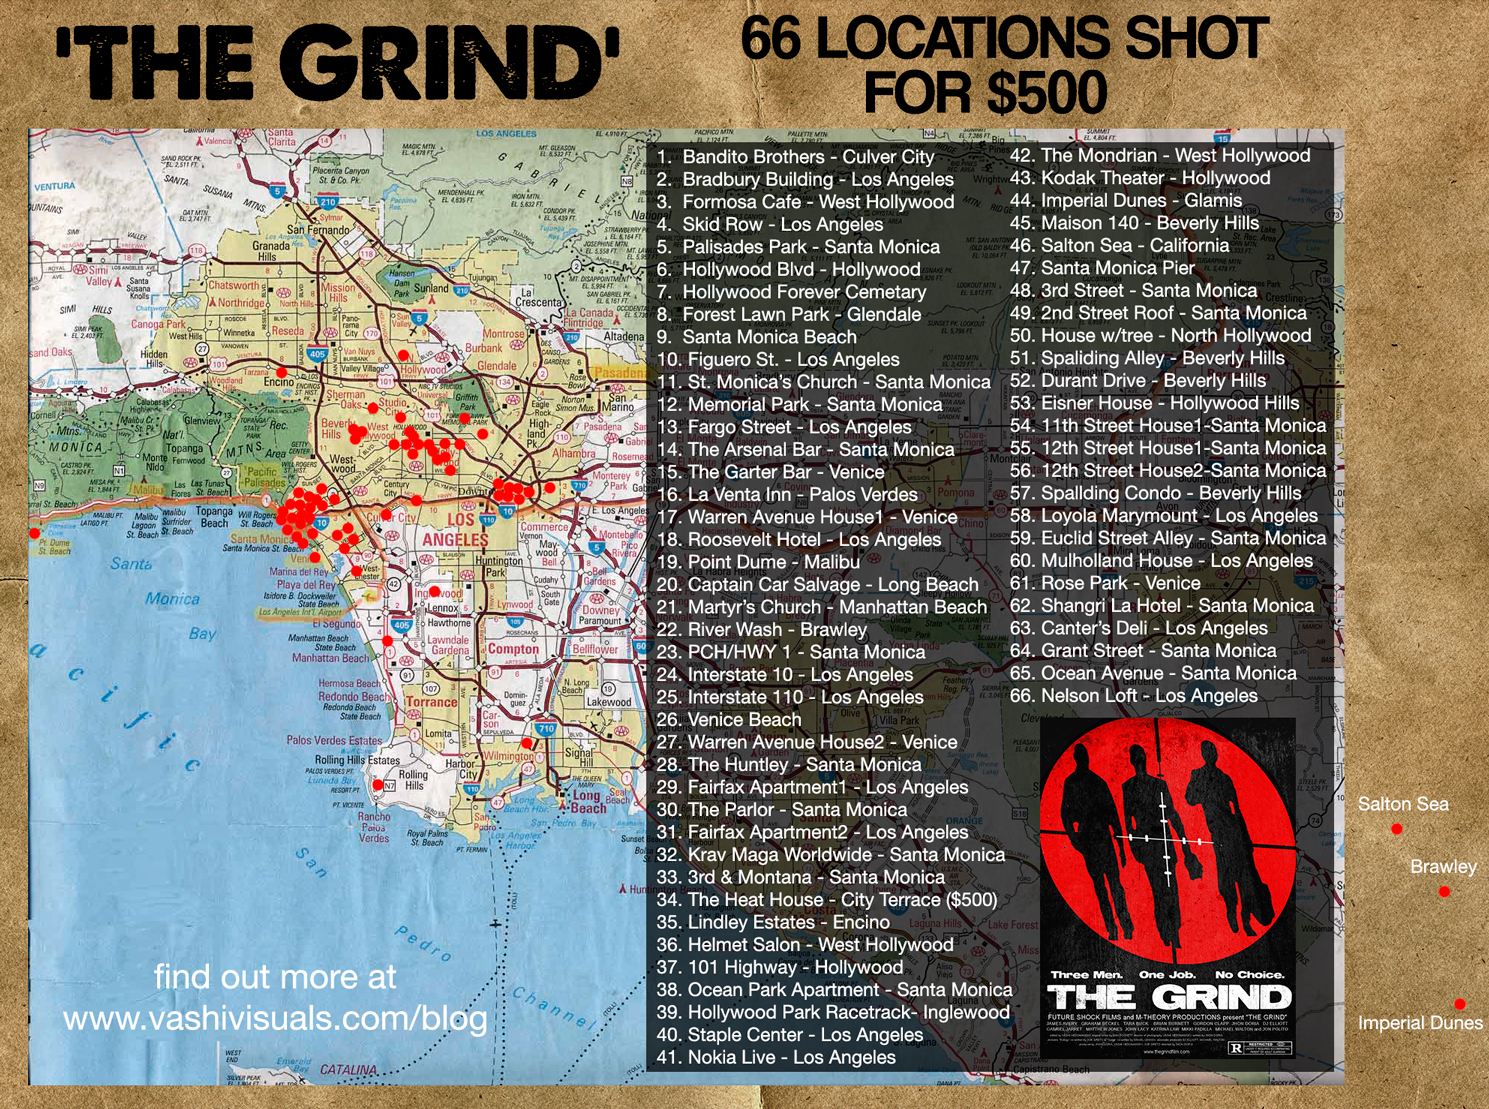
We shot in 65 locations throughout Los Angeles and Riverside county
Shot on Panasonic HPX-170 / HVX-200 / Canon 5Dmkii
60 hours of total footage shot
40 minutes of Los Angeles aerial footage shot by Airborne Images
Music by: Moby / Dan Rockett / Vashi Nedomansky
Nikon AIS, Zeiss ZF, Helios, Mir and Leica lenses
Indie Dolly, Fig Rig, Red Rock Micro camera support, RODE mics
THE GRIND editorial began on Final Cut Pro 7 in 2009. All the Panasonic P2 media was ingested as quicktime files and the Canon 5D footage was transcoded to ProRes. Between raw files and duplicates/transcodes, my hard drives were filling up quick. At the same time I was editing with Adobe Premiere Pro at Bandito Brothers (Act of Valor, Need for Speed) when Premiere Pro CS5 was released in early 2010. There was no longer a need to transcode footage thanks to the Mercury Playback Engine. Also, XML import from Final Cut Pro 7 was implemented. Finally, Adobe Dynamic Link was released that allowed me to send my clips from Premiere directly into After Effects. I made the decision to switch over the entire post production to Premiere Pro for one unifying reason. I was the only person running all of post. Picture, Audio, Graphics, VFX and Music all started and ended with me. I needed help.
I needed the cleanest, most efficient, most powerful and most integrated workflow possible. Adobe Premiere Pro became the HUB of my entire post production.
All my footage and audio started inside Premiere Pro and using Dynamic Link would connect me to After Effects. Tight integration with Audition and Photoshop sweeten the deal and now I have Direct Link to Speedgrade. Like the center of a wheel, Premiere Pro is the hub and the spokes reach out to all the other software. There would be no more transcoding or exporting stand alone quicktime files. There would be no more temp folders holding files that would be rewritten daily and forgotten…only to take up space and confuse my already overflowing coconut. No more time wasted rendering out AE comps, importing and swapping out previous versions. No more brain-sapping, tedious and repetitive clicking and waiting to update my current cut.
I needed simplicity and a clean workflow to help push smartly towards the finish line. The total commitment to an Adobe pipeline was a no-brainer in hindsight. It has saved me countless days of work and probably what’s left of my sanity! Film is a collaborative art form…but the budget had run out and I had to manage and implement the entirety of post production.
My Tips and Tricks used to best optimize my Adobe workflow:
ADOBE PREMIERE PRO CC
For the initial transfer from Final Cut Pro 7, I exported five XML’s out of FCP to match the 5 reels of the locked cut. Why 5 reels? Because longer reels would slow down FCP and its 4GB RAM maximum to the point of uselessness. The project file was pushing 150mb and would often take 15 minutes to load. That was unacceptable. I imported the XMLs into Premiere Pro and merged
all the reels into one 95 minute timeline. I wanted access to everything at once and to maintain a bird’s eye view of the whole film. I like to see the visual patterns of my cutting, see the flow of scenes and the pacing all in one timeline.
I also relinked all the DSLR footage back to the original h.264 masters instead of the ProRes created for the FCP 7 project. Why? Isn’t 10-bit ProRes better than 8-bit h.264. NO, it’s not because Premiere Pro handles the DSLR footage in a 32-bit color space. This means you get the most information out of the original footage. The project was at 1280×720 with all DSLR footage scaled down to fit the timeline. The final export will be at 1920×1080 from inside After Effects using one of its newest upscaling features. At this point, my Premiere Pro file was only 33MB, opened in 30 seconds and I could scroll and playback the entire film (95 minutes) in real-time with no glitches or hiccups.
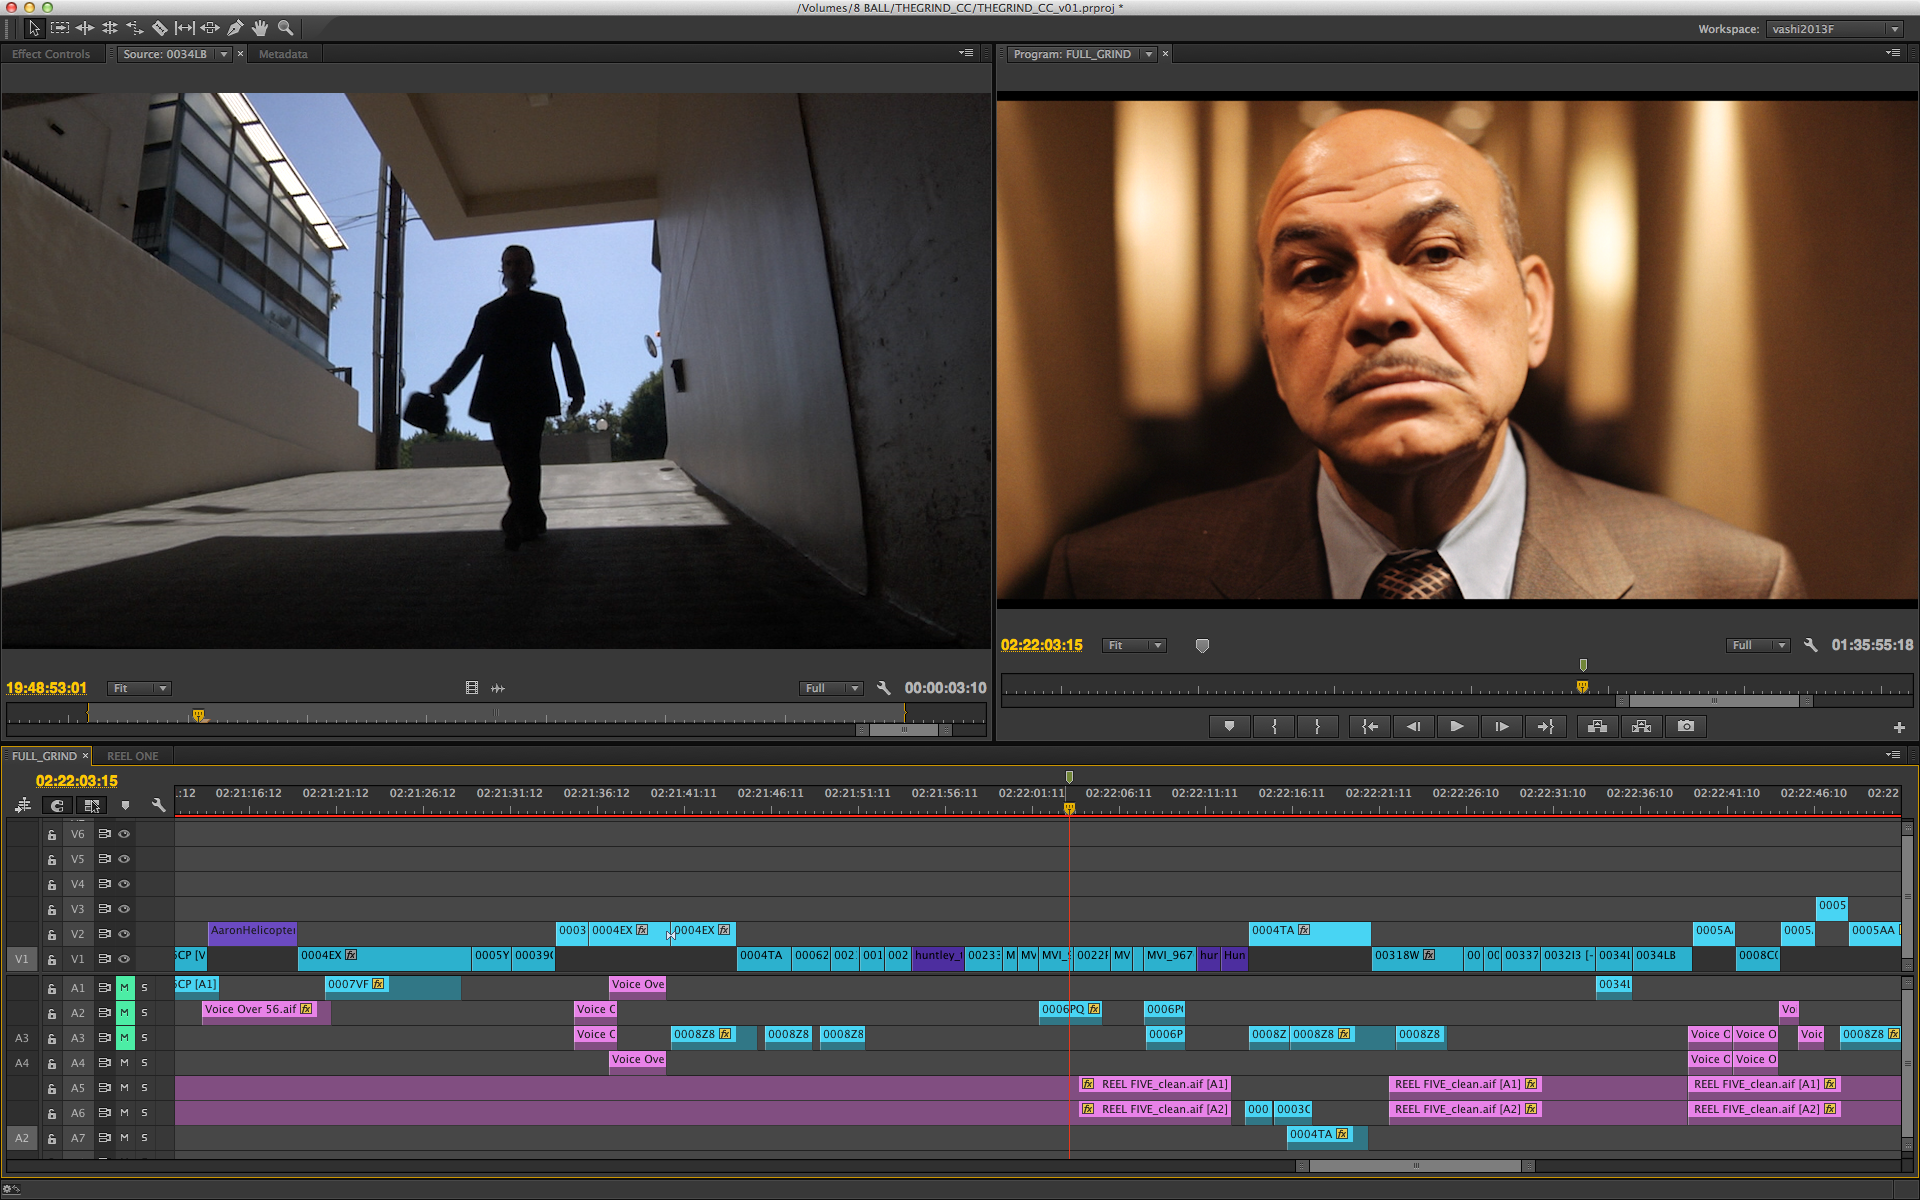
1. My default workspace is the PANCAKE TIMELINE that I created to suit my editing style. It stacks 2 timelines on top of each other. I can then pull shots or clips from my selects reel (top timeline) directly down into my main timeline.
2. I use keyboard short-cuts as much as possible to expedite and streamline my editing. I like to set up pairs of action to adjoining keys. Here’s how the left side of my keyboard is set up:
Q = add 1 second film dissolve transition
W = add 1 second audio transition
A = enter selection tool mode (default cursor)
S = enter slip mode
Z = zoom into timeline
X = zoom out of timeline
The other custom adjustments I make are:
< = move selected clip one frame backwards
> = move selected clip one frame forwards
] = +1 decibal of volume to clip
[ = -1 decibal of volume to clip
V = add edit across all video and audio tracks
UP ARROW = move to next edit point in timeline
DOWN ARROW = move to previous edit point in timeline
3. Warp Stabilization was added inside Premiere Pro in May 2012. Previously you would have to send it to After Effects via Dynamic Link. Not the worst option but because so many shots need to be smoothed out…it was a joy to address them in my main timeline. I find applying Warp to most handheld shots gives them an inherently “heavier” inertia, as if the camera weighs 50 pounds instead of 5. Those little micro-jitters may play okay on an iPad or laptop but once viewed on a 55” LCD TV or projected in a theater…they scream out “Handheld DSLR!”. The default “smooth motion” setting at 50% is magic.
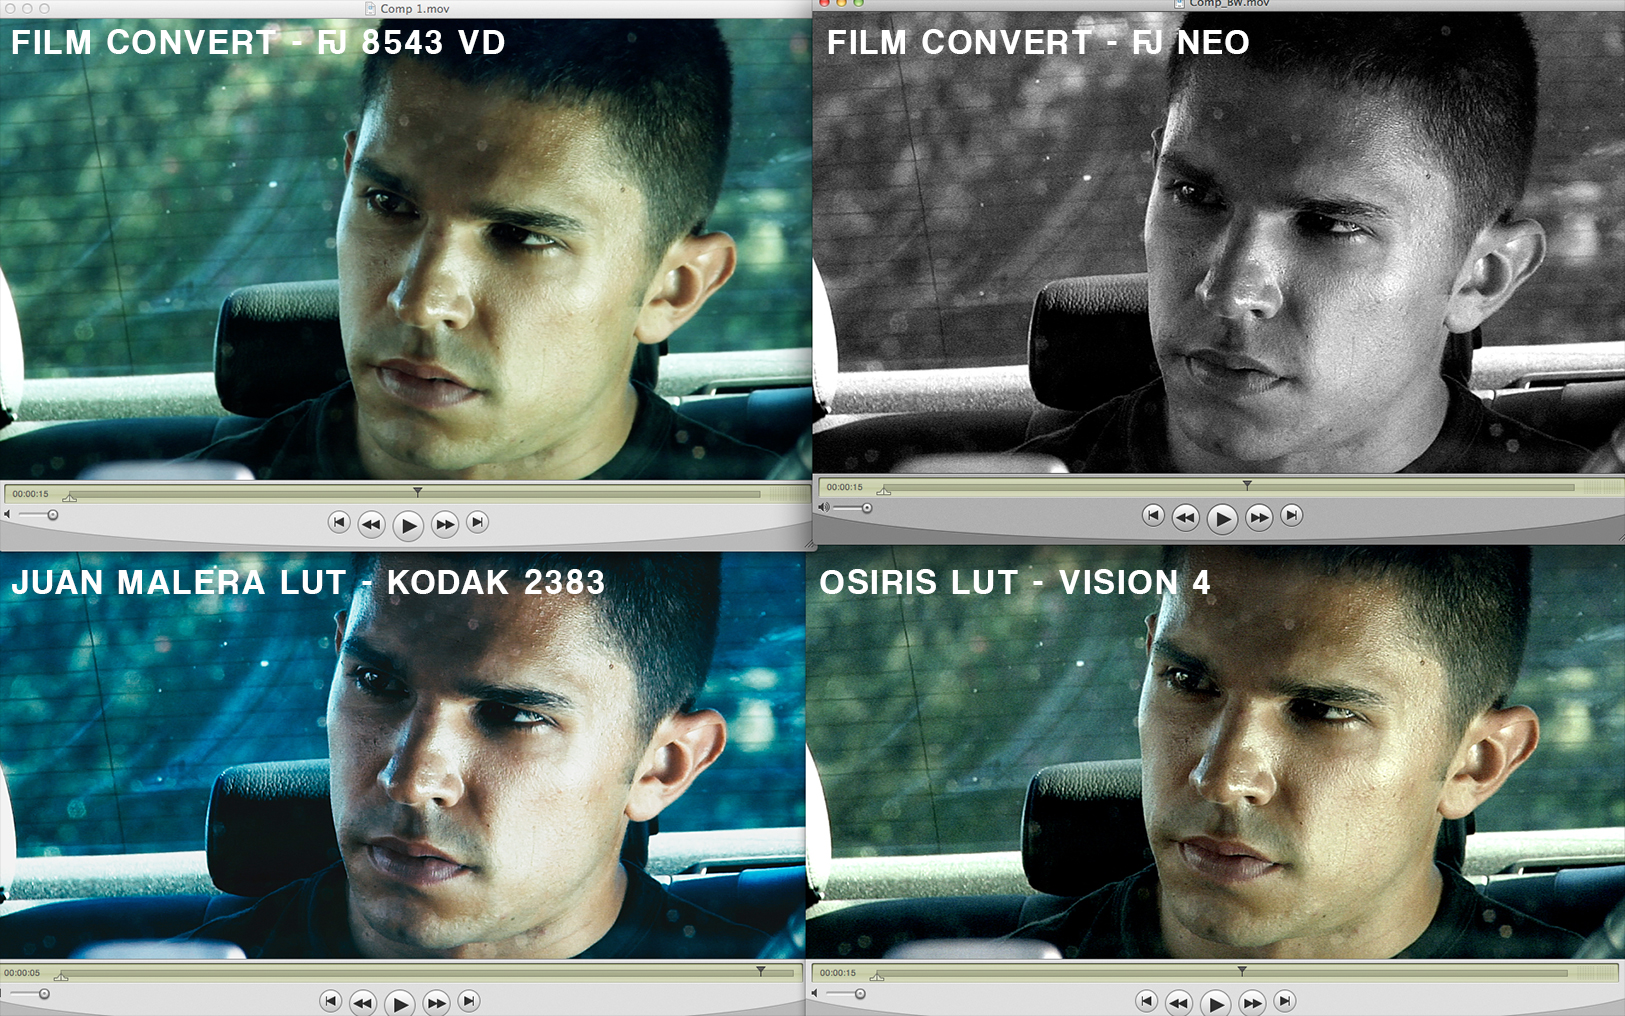
4. Adjustment layers were also added in May 2012. I could now apply global effects to chunks of footage or to the entire timeline. This in conjunction with FilmConvert allowed me view the different film stocks/grain in realtime playback while never leaving my NLE.
BONUS TIP: By applying the Lumetri effect (NOT Lumetri Looks) to a clip or an adjustment layer…you can now open up LUTs in Premiere and preview/playback/export different film stocks and custom looks. I really like OSIRIS LUTs and this free collection of Kodak and Fuji LUTs from Juan Malera.
AFTER EFFECTS CC
For any complicated VFX work or green screen work, using Dynamic Link to send each shot to After Effects was the cornerstone of my workflow. Unleashing the additional power and control of a full compositing platform outside yet still connected to Premiere allowed me to achieve the highest quality results. I had about 50 VFX shots including: green screen removal, muzzle flashes, squib hits, sparks, explosions and one car crash gag where 2 locked off shots were masked and merged to give the impression of 3 cars almost colliding at 100mph.
1. The most important tip for using Dynamic Link is implemented before sending anything to After Effects. I always duplicate the shot and drag it one level above in the timeline (opt+drag the shot) I would then right click on the duplicate shot and “Replace with After Effects Composition”. This allowed me to always have the original untouched shot in the timeline as reference or to copy again to create other versions stacked above it in the timeline.
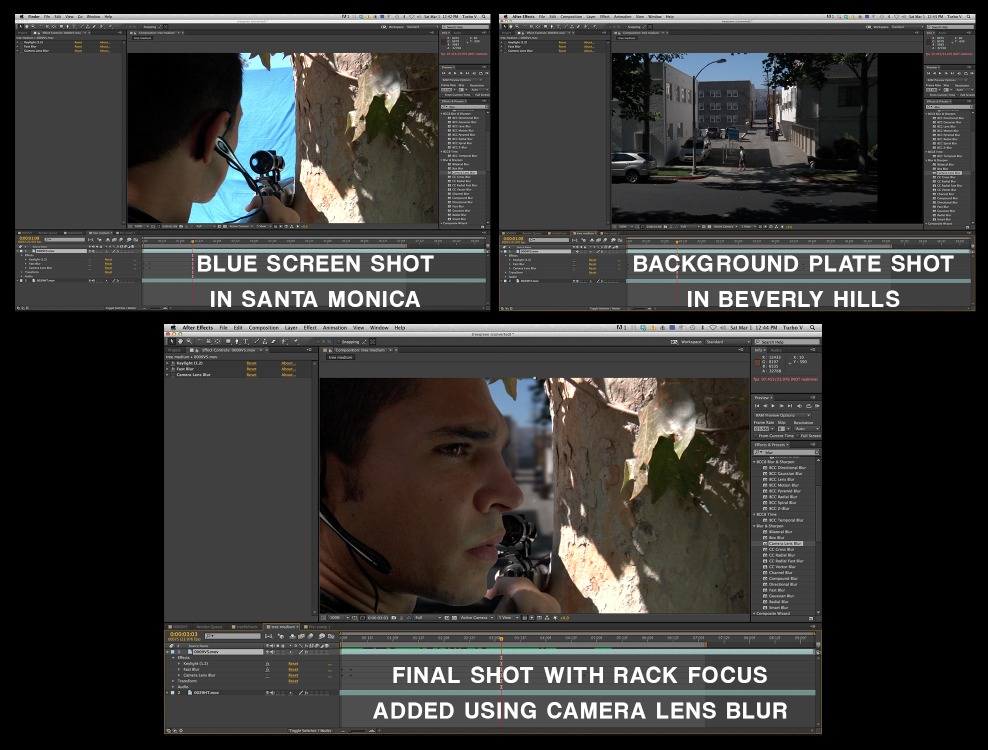
2. I created a camera lens blur transition for one shot that worked quite well. I shot the actor Brian Burnett against a tree with a sniper rifle and a blue screen. I also shot an elevated clean plate from tree height at the location in Beverly Hills where we would be shooting later. As he turns his head I rack focused between the two shots to sell the fact he is really there up in a tree. Dynamic Link allowed me to see the results instantaneously and make adjustments on the fly.
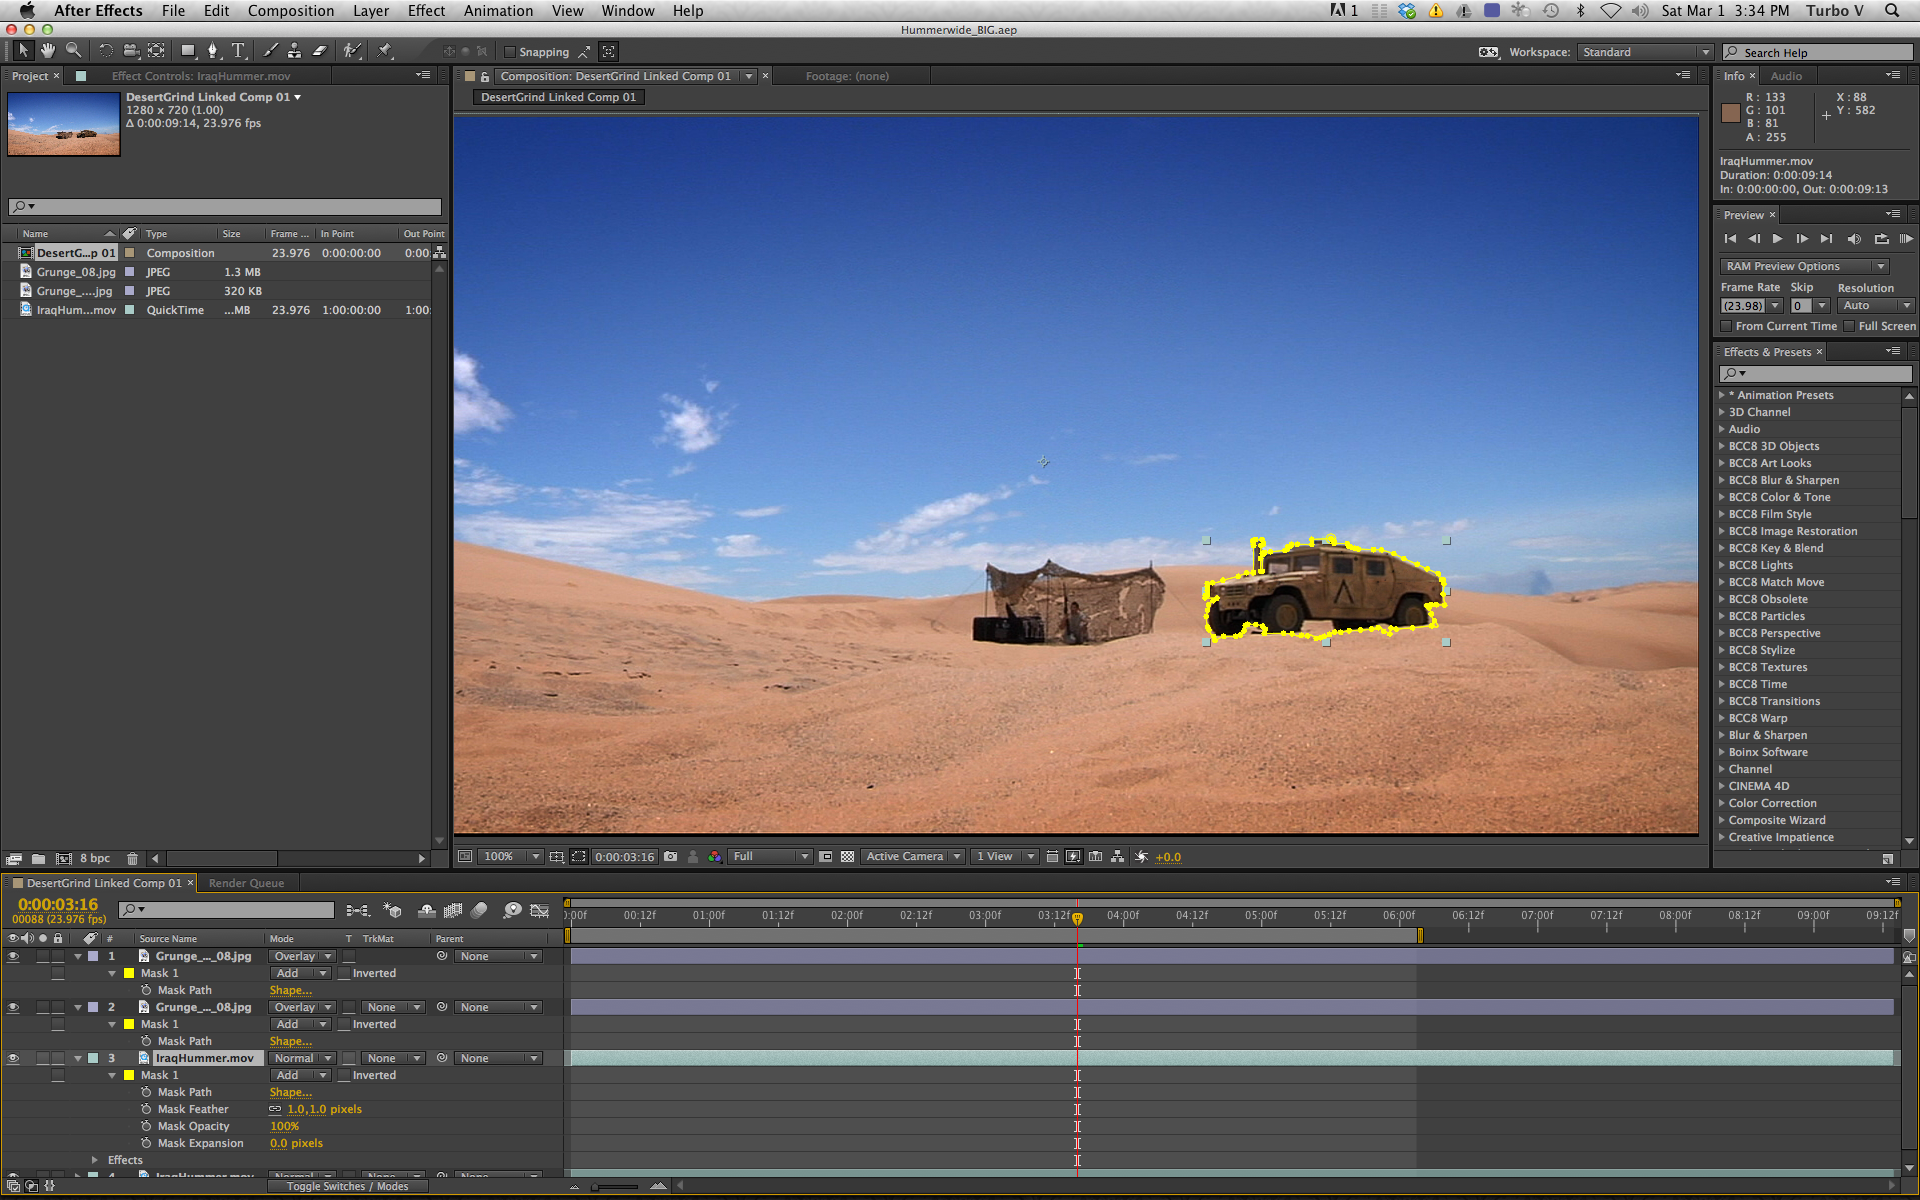
3. A simple but effective VFX tweak was done on the Humvee in this forced perspective shot out in the Imperial Dunes only 150 miles from Los Angeles. The Humvee model was plastic and clean so I added a grunge pattern to the static shot and masked the edges so it fell only on the model. Simple but it added the right amount of realism and grit to the shot. You can read more about this shot and forced perspective here.
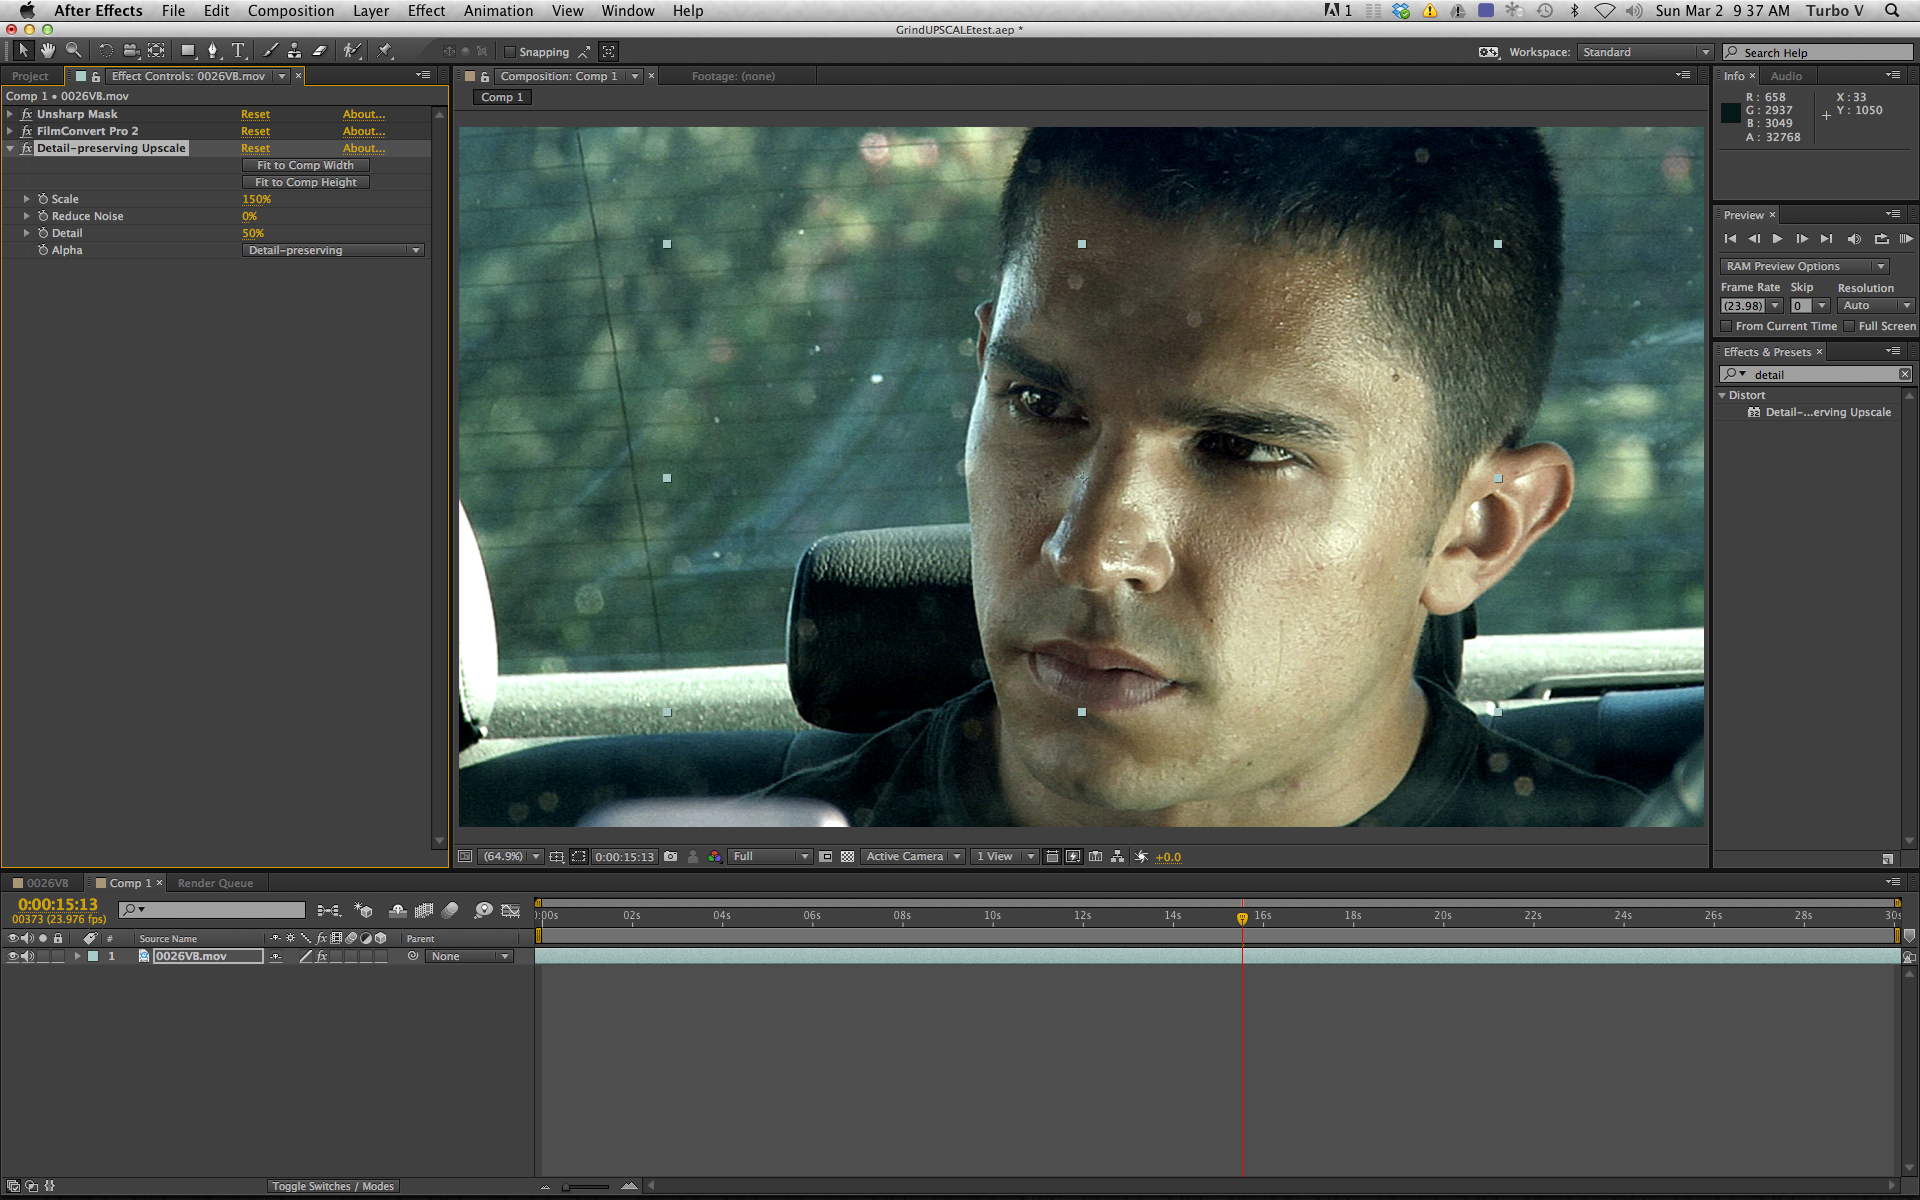
4. As mentioned earlier…the Premiere Pro project was set up at 1280×720 with all DSLR (1920×1080) footage scaled down to fit. For the master output, I will be utilizing the new Detail-Preserving Upscale effect to best handle fine detail for the up-conversion. My initial test to upscale one minute of 720 footage with a FilmConvert treatment to 1920×1080 ProRes HQ took 4 minutes. The results were very sharp and free of artifacts. I set detail to 50%, reduce noise to 0% and chose the slower Detail-Preserving Alpha setting. My previous attempts with straight upscaling and adding sharpness in post were nowhere near as good. Boom Shaka Lacka!
AUDITION CC
As you can see in the timeline image at the beginning…I roll deep with my audio. Even in the temp mix I was pushing more than 36 tracks. There is a reason audio is said to make up more than 50% of the movie experience. The woven audio mosaic that flows and swells underneath the imagery must be sonically well balanced as it moves the story forward. This applies to both music and SFX as well as dialog. The spoken words must be as clean, legible and space appropriate for the whole experience to be appreciated fully.
1. If you only work on one thing to improve the audio of your project…I would say work on the DIALOG. Denoise it. Clean it up. EQ it so matches the physical space it lives within. Remove pops and extraneous noises. Compress or limit it so it sounds full and rich but not over-processed. All of this is easier said than done! But these are the steps I go through to create the best sonic world in which the film lives.
2. To get my entire film over to Audition CC, I highlighted the sequence in Premiere Pro and clicked on EDIT > EDIT IN ADOBE AUDITION > SEQUENCE. Six minutes later, the entire 95 minute timeline opened inside Audition and was ready to be attacked.
3. To properly handle the audio post production tasks, it’s important to split your sound assets into categories on the timeline. You can do this during the temp mix inside your NLE or after you lock picture and send it over to Audition CC. Here’s the method I use from top to bottom:
DIALOG (mono tracks)
ADR
PRODUCTION SOUND
SOUND FX / FOLEY
PADS / AMBIENCE / TEXTURES
MUSIC / SCORE
Now you can zoom in and move horizontally to address each component sound one at a time and still know where you are in relation to the entire film.
4. The basic DIALOG pass consists of matching volume, cleaning and EQ.
We shot 95% RODE lavalier mics on THE GRIND and captured clean, good levels. First, I move clip to clip and even out the dialog levels so they fall somewhere around -12db on average. This can done manually or you can apply the MATCH VOLUME effect to groups of clips to essentially normalize the audio to a certain peak volume. I like to take my time and do this manually so nothing funky happens…which is always possible with automated processes.
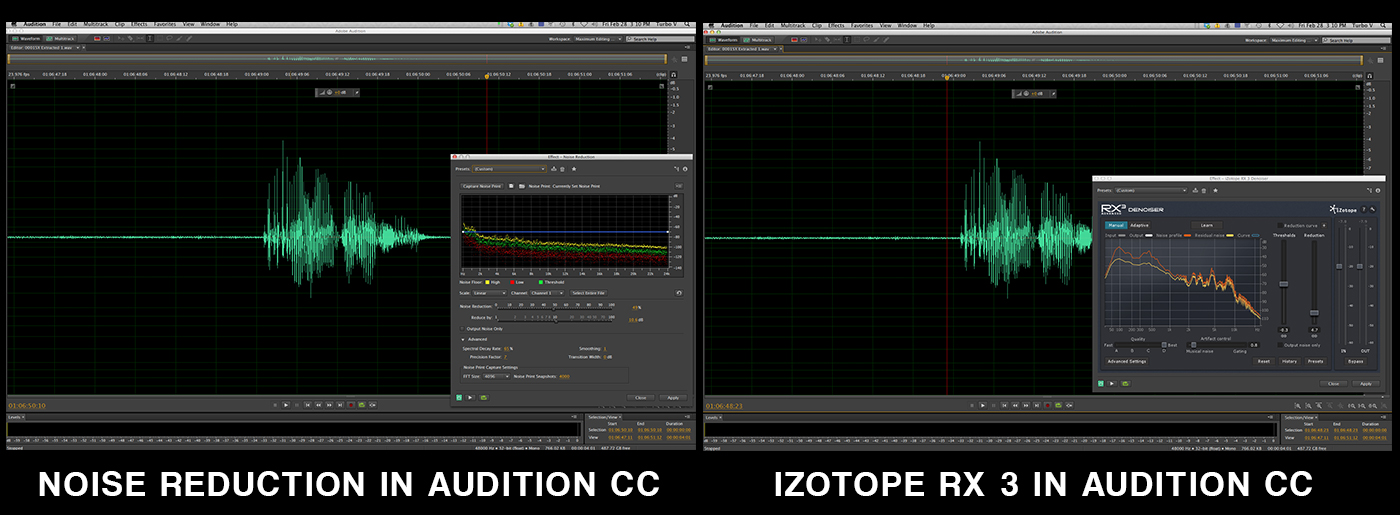
Next I will remove any background noises from each clip. This can the hum of a fridge, air conditioning or traffic and street noise because in our case we shot 30 pages of the script inside a parked car with the 3 lead actors. In the past I’ve always used Izotope 3 to de-noise my dialog but have to say that the Noise Reduction effect inside Audition CC gives me equal results in normal situations.
It’s really amazing to isolate the dialog, clean it and hear how much more professional it can sound with very little effort. One cardinal rule of good sounding audio: Before adding or amplifying something…consider removing or lowering something else. This applies to volume, frequencies, and effects across the board. You can quickly end up with a cluttered and undefined sonic palette. In other words…it sounds like shit.
Lastly, I apply a high-pass and low-pass filter to remove frequencies below 100hz and above 10khz. This removes any other deep rumbles and hums you may not hear in the low end sound spectrum as well as the sizzles and high pitched noise at the top end. You may not hear these frequencies on a laptop, iPad or cheap speakers…but once your audio mix is played through a pro system or in a theater…it will be painfully obvious and distracting.
Since 95% of the dialog was captured with lavs, I didn’t have to use heavy EQ to match boom mics with the lavs which is an art in itself! The additional 5% of dialog was voice over recorded by Jon Polito, who played the articulate villain in the film. This was captured by an OKTAVA MK-012 hypercardiod and RODE NTG-2 shotgun and required only minimal adjustment. For more info about my EQ and audio secrets, check out these 5 EQ audio tips.
Once my dialog and mix were completed I chose MULTITRACK > Export to Adobe Premiere Pro > Export each track as stem. This brought all my tracks back and kept them all as separate tracks. This is NOT a mix-down or stereo mix. I still had access to each individual file on each track. The Final Final mix will go out in 5.1 surround once everything is absolutely final. I hope that day comes soon!
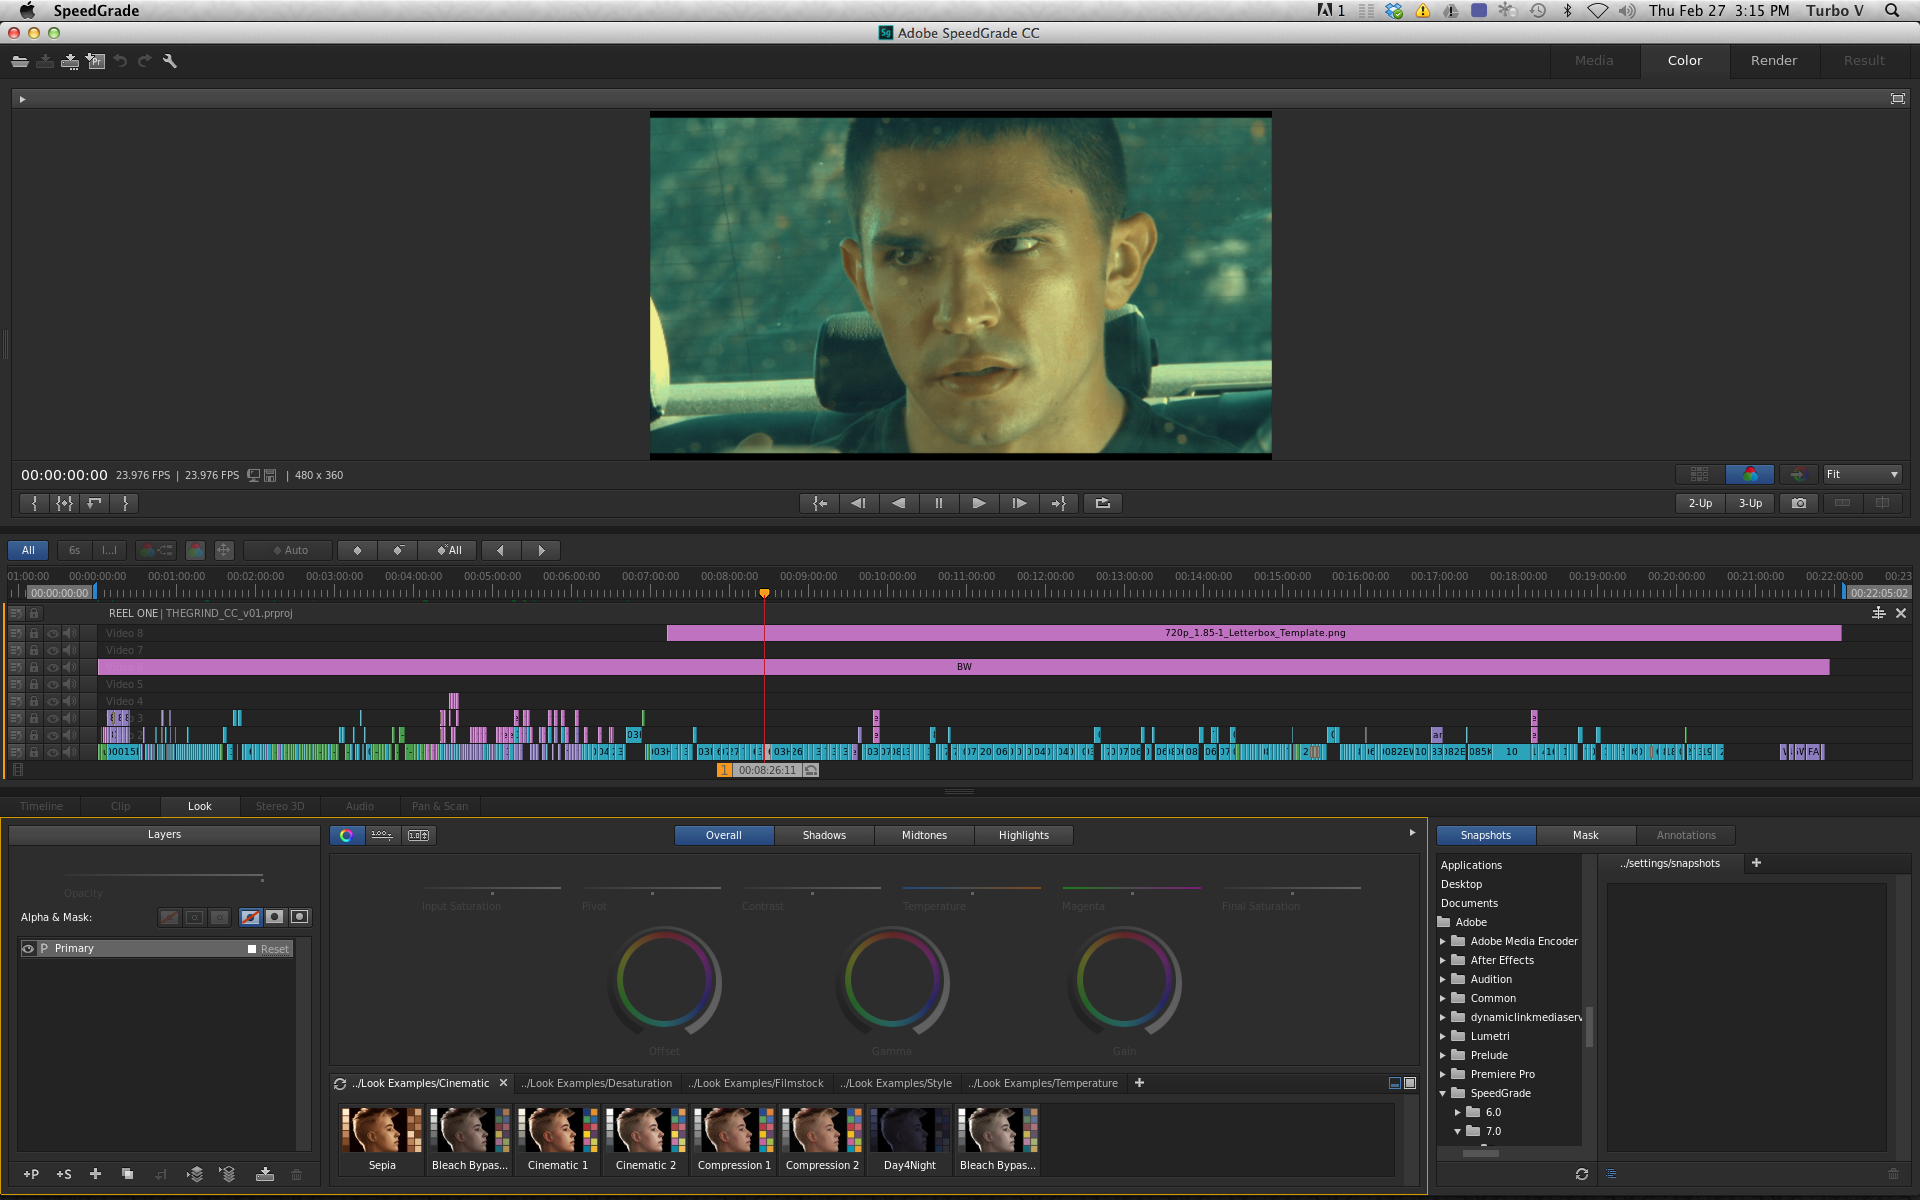
SPEEDGRADE CC
The latest version of Speedgrade now has true round-tripping where your Premiere Pro timeline is imported, opened and you have full access to your files. Once you grade your film or just tweak certain shots…those changes are represented and updated back in your active Premiere Pro timeline. I’ve used Davinci Resolve to grade my last 3 feature films but will be switching to SpeedGrade to finish THE GRIND as I won’t have to deal with XML exports, conforming the different formats, aspect ratios, lack of timecode in DSLR footage and many other bumps in the road that extend my already long days. The notion of keeping my entire film inside Premiere Pro is quickly redefining my workflow and outlook on post production.
THE FINAL PUSH
I’ve invested 5 years of work making my film the best film it can be. From story, to edit, to sound and color…it’s been a battle. Disagreements with the director, legal issues over paperwork, contracts and rights. Failed hard drives and temporary loss of essential footage. Grabbing insert shots years after principal photography ended to clarify a story point. It’s been up and down but I can finally see the finish line. The best feeling came once I corralled all the film elements and dialed in my workflow so that I had direct access to every asset on one computer. I could see what was missing and could make the necessary creative changes under my own roof with minimal digital pushback or having to export files to other software or other people. I could have stayed in Final Cut Pro 7 and finished the film. I could have kicked out OMFs and worked in Pro Tools. I could have sent an XML and hard drives to another colorist. I decided to streamline my system and make everything fluid inside my Adobe pipeline.
At the end of the day, who knows the story, the footage and the vision of this film better than me? There is no more money for post and there is no worse question to ask of someone then “Can you do it as a favor for me?” Everyone’s time is valuable and what kind of effort and dedication would I get by asking for freebies from these talented individuals.
What I created for myself is an optimal workflow that allows me to jump back into the post production the second inspiration strikes or the moment I have a new idea to try out. I now know I can finish this film, on my own schedule and at the highest technical level that technology allows. I have the best tools, an ironclad workflow and the will to keep chipping away until this sucker is done.
LINKS to FREE Assets and Plugins I use daily on my own projects:
The 6 Best Free Plugins for Adobe Premiere Pro and After Effects
335 FREE Filmmaking Assets and Tools
VashiMorphic40 – The FREE Anamorphic Lens Look After Effects Project
To learn more about my tips and tricks…please register to join me on
Adobe’s ASK A VIDEO PRO free interactive web seminar on March 13, 2014.
I hope this helps you with your own film post production workflow.
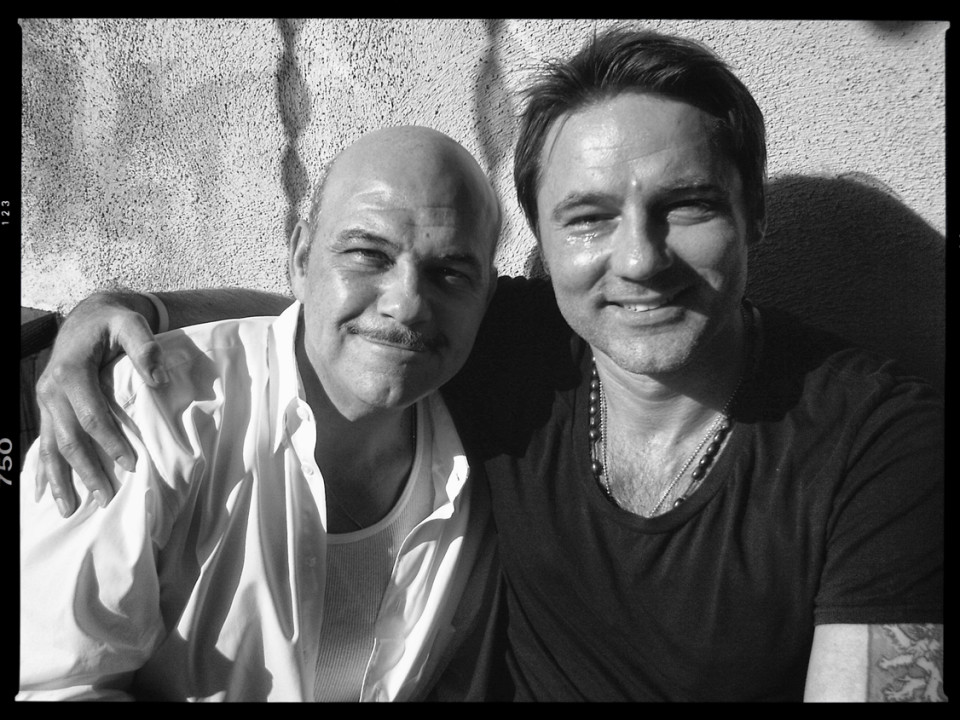
September 2, 2016 – RIP Jon Polito. A gentleman, artist and friend.
Until next time…

There are 24 comments
This is the best blog post i have EVER read on a filmmaking blog. Particularly having also made the switch from FCP7 to the Adobe suite. Congrats on seeing the finish line and looking forward to seeing it.
Thank you so much Jonny. That really means a lot. I’ll let you know once it’s done!
Ehej mate, really helpful and great article. I am also working in Adobe Premiere and most of audio and video editing, I am doing myself. I am using CS6. And also break most important rule, I invest my own money. I have footage from gh2 and mkII. One question to ask you:
What is the final output from Adobe Premiere for “The Grind”, later maybe to make DCP?
I will be outputting DCP for theater screenings and ProResHQ masters for compression and web delivery.
There is a paid option going out of Davinci Resolve and many free options for DCP including:
http://www.thefilmbakery.com/blog/creating-a-feature-film-dcp-using-opendcp
Wow. Thanks for that Vashi, I’m looking forward to seeing this film when its complete!
Warm regards (even though its bitter cold here!) from London ON, Canada
Thank you Jonathan and stay warm! I grew up in Detroit and Toronto and made the drive across the 401 flatlands too many times to count!
Thank you. timely post.
My pleasure! I hope you can take a few nuggets of info into your productions.
Fascinating read. Thanks for sharing. Best of luck with finishing the film.
Much appreciated Daniel. Thanks for taking the time to read my ramblings and I’m shooting for a late 2014 release for The Grind.
Where’s the trailer???
I’m about to lock picture on a feature length documentary this week and have an amazing film project about to start…but will try to shoot out a solid trailer. It’s time!
Great job!! Every day I wake up and the first thing I do is check out your page. I always learn some thing from you.
Thanks!!
So very appreciated Antonio. I post when something special strikes me and I’m glad you are enjoying and learning from it. That’s what it is all about. Thank you for all your support!
I would just like to thank you for taking the time to write about this process. I’m a filmmaker who happens to be, more often than not, doing a lot of things solo. I’m only just into the post on my first feature film with a second feature in pre-prod, and you’ve just taught me some valuable lessons in getting my workflow a little tighter using some of the methods you’ve described as inspiration. And thats probably the biggest thing I should thank you for, is you’ve just saved me a lot of time in post by writing about this from an individual standpoint when its left to just you to carry it through post.
I can’t thank you enough Peter! If I can find a way to make my work days shorter or my workflow a little more efficient…I really want to pass that knowledge on. It takes a lot of shitty and brutal workflows to break you down before you search for a better way. I’m glad to share anything I learn to make the creative part of our job easier to engage and implement!
This is quite an incredible post Vashi! The amount of details you shared is remarkable and I truly enjoyed reading it. It’s not often that I find myself reading a whole article from start to end without getting distracted by something else, but in this case I found myself reading thoroughout the whole thing without stopping 🙂 Great post Vashi, would love to see the final result!
Daniel, Thanks for the kind words and for reading all 3500 words of my babbling! I’m glad I didn’t bore you and since this project is so close to my heart I really appreciate you plowing through the whole post. I will be posting trailers and updates as I can crank them out. I have a documentary I’m just about to lock picture on and another feature film that I’m editing starting next week…but every free moment I will return to The Grind. Thanks again!
Dude. DUDE. THANK YOU. I feel as though this post tied in EVERYTHING I’ve been looking for about the creative cloud work flow. Being in the same boat and doing a lot of edits myself, I’ve found Premiere to be a time/life saver, but haven’t read anything as concise, helpful, or encouraging as this. With a lot of talk out there about what the newest features are of NLEs and what their strengths/weaknesses are, I feel the basics get lost. The basics of how the WORKFLOW is best tackled. I can’t thank you enough for this article. It is printed and put in my reference file. With how busy you are, thank you for taking the time to share this and thank you for helping me to become a better filmmaker. Can’t wait to see your film.
Wow and thank you so much Josh! Your words mean the world to me. Every step of the filmmaking process is a struggle and post can be extra difficult…especially when it’s only one person carrying the weight. I’m glad my tips helped out and wish you luck with your projects too! I’m looking to finish The Grind later this year and will let you and everyone know once I’m close! Thank you again for your kind words J!
You are one talented man Vashi! And you blog is such a fantastic library of knowledge for someone not as well versed in the art of film creation, however anyone is destined to improve ones craft considerably reading your site and posts. I go back to your post over and over again. Please let us know when you have a trailer ready or released your film.
I think not to invest your own money is the golden rule in all business ventures but I can see why you had to do it here. Most of it was to pay the actors since you handled everything else?
Im on Final Cut Pro X, side track I know, which seem very limiting in terms of making a full feature and mostly in the audio section and effects.
And specially in the automation tool concerning volume, always hard to get a smooth volume curve both in premier and Final cut compared to Logic. Or am I imagining things?
If one is primarily doing short blogvideos, occasionally music video or short documentary I think Final Cut is enough, agreed, or do you recommend anyone to learn CC (I don’t plan on working as an editor in the future)?
Thank you for an amazing site!!!
Hi Vashi,
I just stumbled upon your site and want to thank you a lot for sharing your experience and knowledge in such rich detail in this fantastic resource! Seems like I’ll be plowing through it the next couple of days 🙂
I have a few questions regarding this article, things that I also stumbled on and hoping you might be willing to give some insight.
“4. As mentioned earlier…the Premiere Pro project was set up at 1280×720 with all DSLR (1920×1080) footage scaled down to fit. For the master output, I will be utilizing the new Detail-Preserving Upscale effect to best handle fine detail for the up-conversion. My initial test to upscale one minute of 720 footage with a FilmConvert treatment to 1920×1080 ProRes HQ took 4 minutes. The results were very sharp and free of artifacts. I set detail to 50%, reduce noise to 0% and chose the slower Detail-Preserving Alpha setting. My previous attempts with straight upscaling and adding sharpness in post were nowhere near as good.”
Your original footage is 1920×1080. “footage scaled down to fit”;
1. do I understand correctly that all files were re-encoded to 1280×720? If so, why was this done – for display performance or another reason? Because in the beginning of the article it says “There was no longer a need to transcode footage thanks to the Mercury Playback Engine.”
2. do I understand correctly that the scaled down files are going to be reversely upscaled again to 1920×1080? Would it be possible to re-connect the original 1920×1080 before export? (except for the after-effects processed ones with masking, etc… or could it, especially when I see you used vector-masks). Because in the first pass during the down-scale quality is being thrown away (forever), which in the second pass, the up-scale, is tried to get back into the image again. In the whole workflow, losing quality in each step:
1. first quality reduction in-camera; from what come raw on the sensor to what is being stored in the h.264 mp4 file;
2. re-encode and down-scale from 1920×1080 to 1280×720;
3. re-encode and up-scale from 1280×720 to 1920×1080;
4. re-encode to final output.
The first step with DSLR’s is of course inevitable (as, in general, is the last step). But the rest?
Thanks in advance for sharing your insights 🙂
Hi Mike and thanks for the question. The majority of the film was shot at 720 with only one full scene and several inserts/exteriors/establishing shots filmed on DSLRs.
I scaled down for the edit with the 1080 footage but kept all those shots on a separate layer so when I export and up-rez via After Effects…it was only for the layers of 720 footage. The 1080 remained intact and I color graded the original files with no re-encoding. I agree it would make no sense to down rez then up-rez. I hope that clears it up and thank you for the kind words! All the best…Vashi
Loving the info on this web site, you have done great job on the content.