

Film Editing begins with organization. A feature film can have anywhere from 77 minutes of footage as in PRIMER to over 500 hours of footage shot on DEADPOOL. On both films…keeping track of the footage and making it all instantly accessible to the editor is paramount to a successful edit. On my current feature film 6 BELOW I am using markers in a new way.
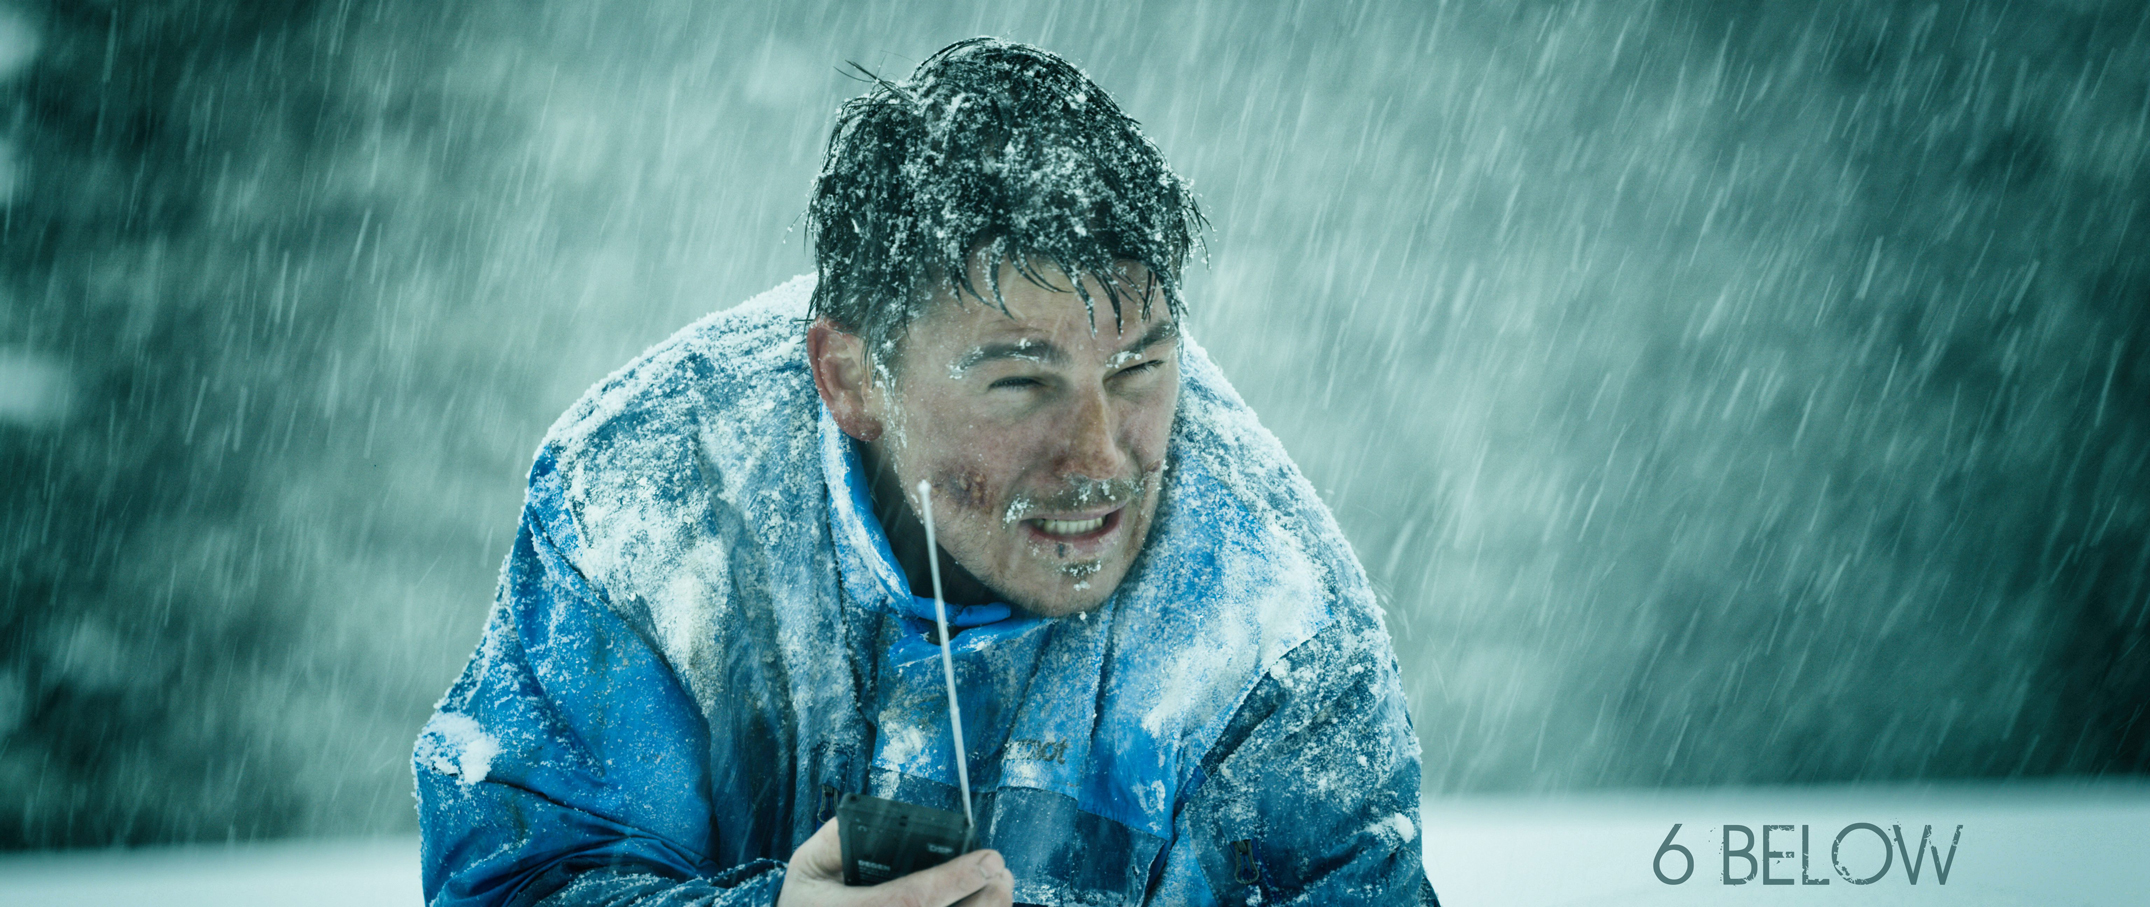
Josh Hartnett in the survival thriller 6 BELOW
By using MARKERS on timelines and sequences to notate takes, scenes and memorable moments an editor can isolate specific shots or sections that all the filmmakers can use to help wrangle all the footage and help tell a clearer story with all the footage.
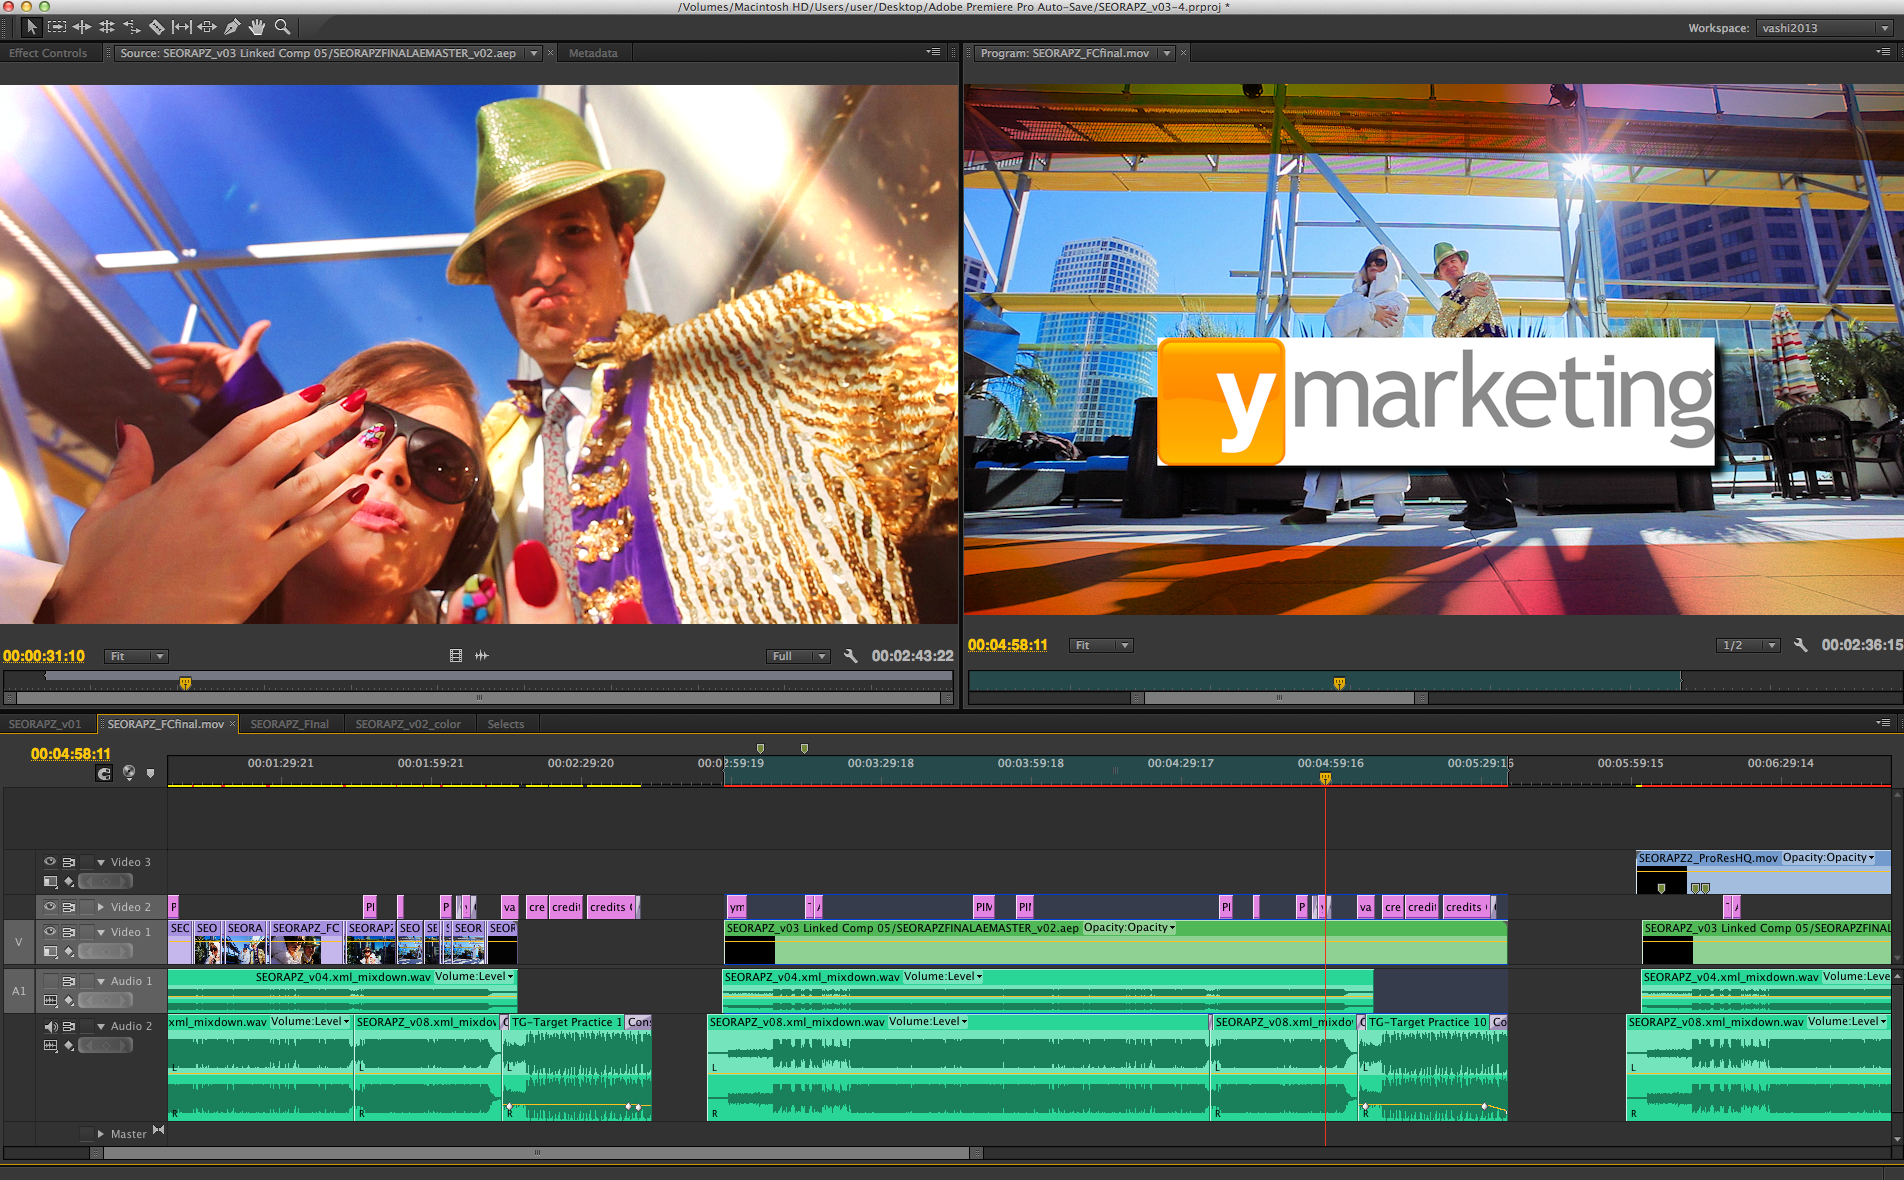
All editing software allows for dropping markers on timelines but I utilize one little know function inside Adobe Premiere Pro to help me mark larger groups of shots or sections of similar content. A marker is usually placed on one frame but I like to extend that marker to cover minutes or whole swaths of footage. I then assign a name to the marker and this allows me to visually spot my assets very easily inside my timeline.
Click the image below to see how to extend markers in Premiere Pro.

Extending Markers in Premiere Pro
By double clicking a marker inside Premiere Pro…I can extend the duration of the marker to whatever time period I need to cover a section of my timeline. This allows me to color code and name different assets which makes it easier to share my organizational system with assistants, the director and producers.
You can also grab a marker and ALT-drag to lengthen it right in the timeline.
Until next time…
There are 2 comments
Hi Vashi
Nice to know someone else uses markers like this. I used markers extensively to log footage and create timecoded transcripts in the feature-length doc ZOO(2007). There was very little manpower besides myself and I can’t imagine how I would have made do if I hadn’t used markers in this way. Of course I was using FCP 7 at the time and the marker implementation was a bit stressed by my extreme use of it. I hope Premiere can improve on that!
Markers are an integral part of my post-production process. It saves time and when I do string outs of entire days and scenes, I can really navigate through footage with ease and visual cues to guide me.