Originally published October 28, 2013 and updated January 4, 2018.
Download Template (.zip file)
Download Template – 4K Version (.zip file)
Download Template – After Effects CS5.5 Version (.zip file)
Films shot in the Anamorphic format are instantly recognizable. They have a quality and resonance that other lenses can’t capture. Anamorphic films seem to capture an almost 3D quality onto film’s 2D medium. The process makes creative use of aberrations such as long horizontal lens flares, oval bokeh and highly curved corners that all add a sense of heightened reality.
Films are real but not necessarily reality…and the subconscious effect of Anamorphic lenses delivers an exaggerated look that is hard to replicate. This process is much more than just a wide aspect ratio..as demonstrated in The Ultimate Aspect Ratio Guide.
Films shot in the Anamorphic format include: Jaws, The Royal Tenenbaums, Raiders of the Lost Ark, Pulp Fiction, Die Hard, The Parallax View and countless others. Getting your hands on Anamorphic lenses is very difficult for the low budget filmmaker…so I created my own After Effects project template that replicates the look and feel of the Anamorphic format. If you drop your footage into the timeline…you will have access to 3 options that help you achieve the magical look without resorting to additional adaptors or lenses. This workflow has been optimized for cameras that capture 16:9 footage and for lenses between 28mm to 35mm (Full frame equivalent).
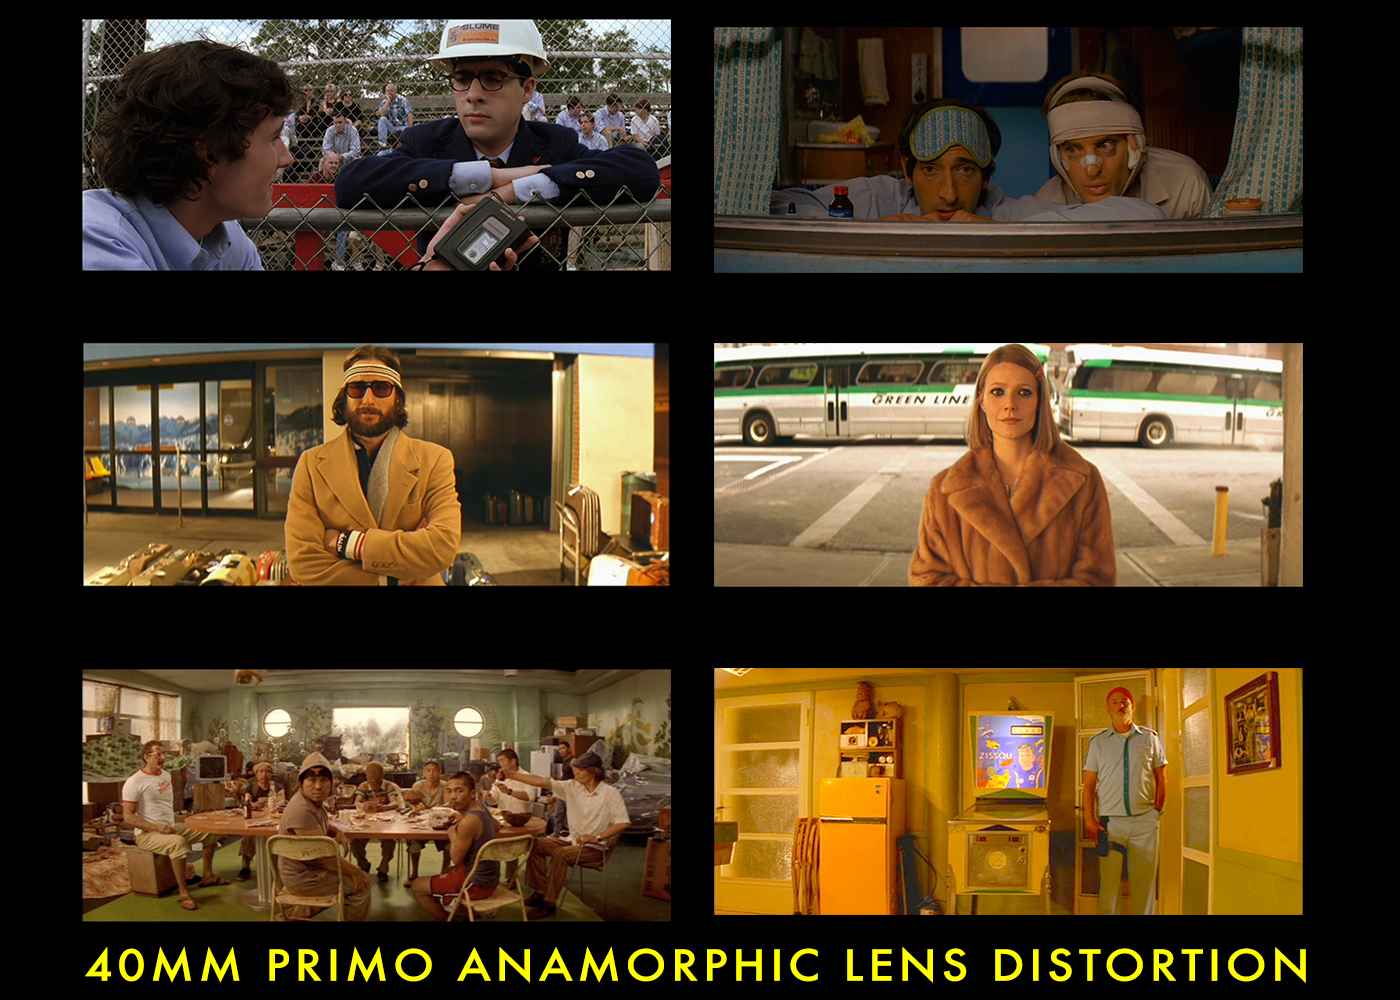
The Anamorphic lens that I chose as the holy grail to emulate is the Panavision Primo 40mm Anamorphic. It was the ONLY lens used on Roman Polanski’s Chinatown and used 95% of the time on Wes Anderson’s films Rushmore and The Life Aquatic with Steve Zissou.
I am proud to share with you my free After Effects Plugin Template…VashiMorphic40.
The VashiMorphic40 After Effects template was designed so that every filmmaker, on any budget, can capture the aesthetics and visual style of the Anamorphic lens. The plugins used in this project are included in After Effects or are free to download. I focused on matching the curvature and look of the 40mm Panavision Primo Anamorphic lens.
It is often said that a 50mm (spherical) lens is the closest field of view (FOV) to human vision…but I don’t necessarily agree. If you look through a 50mm, the peripheral view is nowhere near as wide as what the eye sees. I feel we view the world with more of an Anamorphic field of view. The 40mm Panavision Anamorphic has a 40mm vertical FOV but a 20mm horizontal FOV.
This wider view approximates what to me feels more like the “real world”.
I built this free project specifically for the low budget filmmaker. If using a full frame sensor…I recommend a 28mm or 35mm lens. These focal lengths can be found inexpensively as prime lenses from every vendor. Also, the most popular zoom lens: 24mm-70mm contains both lengths. For APS-C sensors I recommend a 20mm or 24mm lens. For BMCC use 10mm or 12mm.
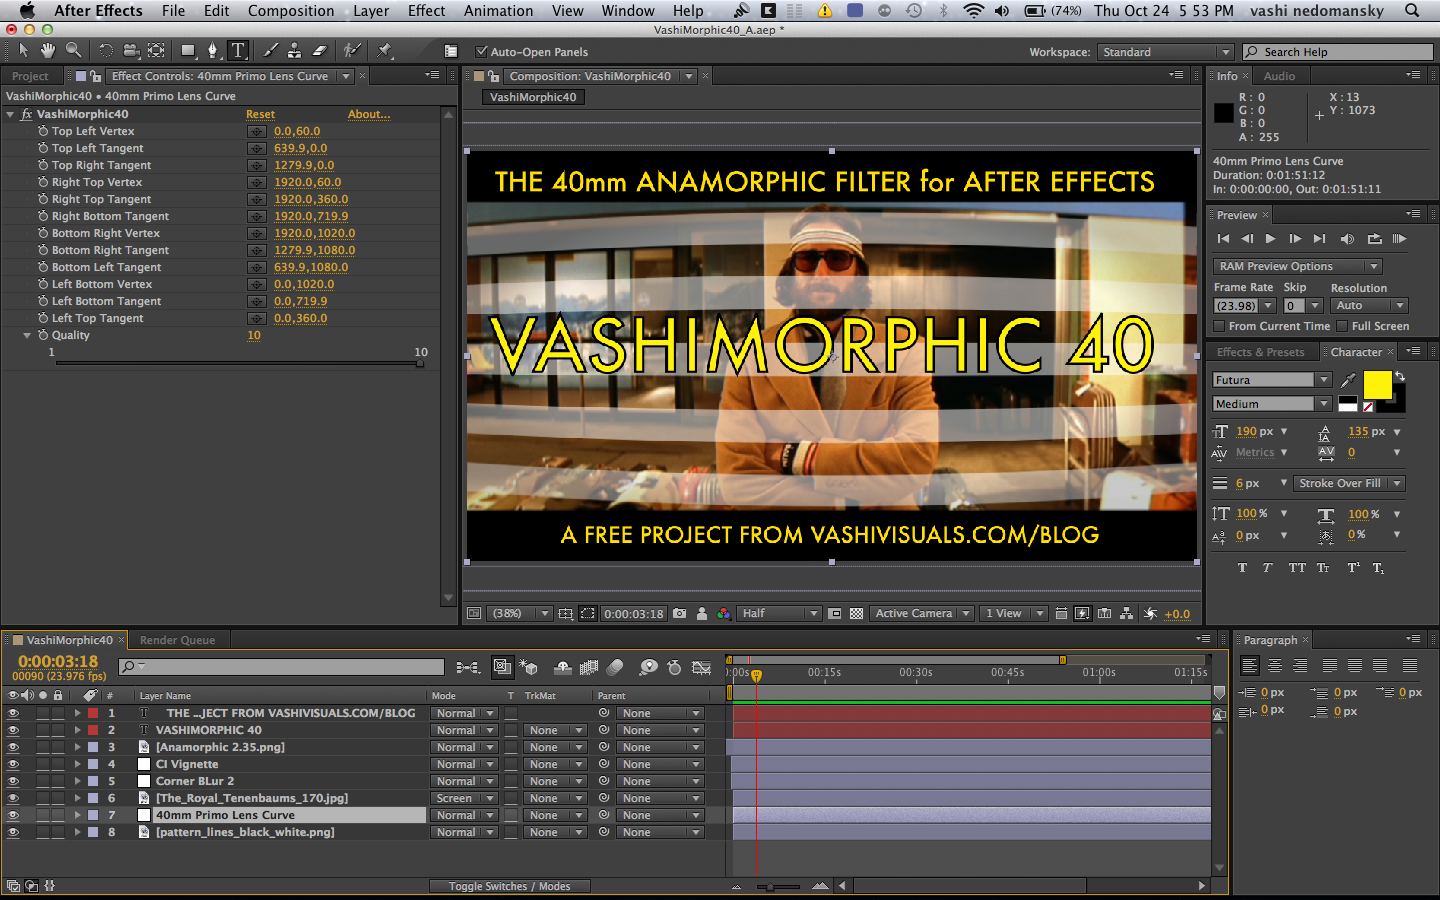
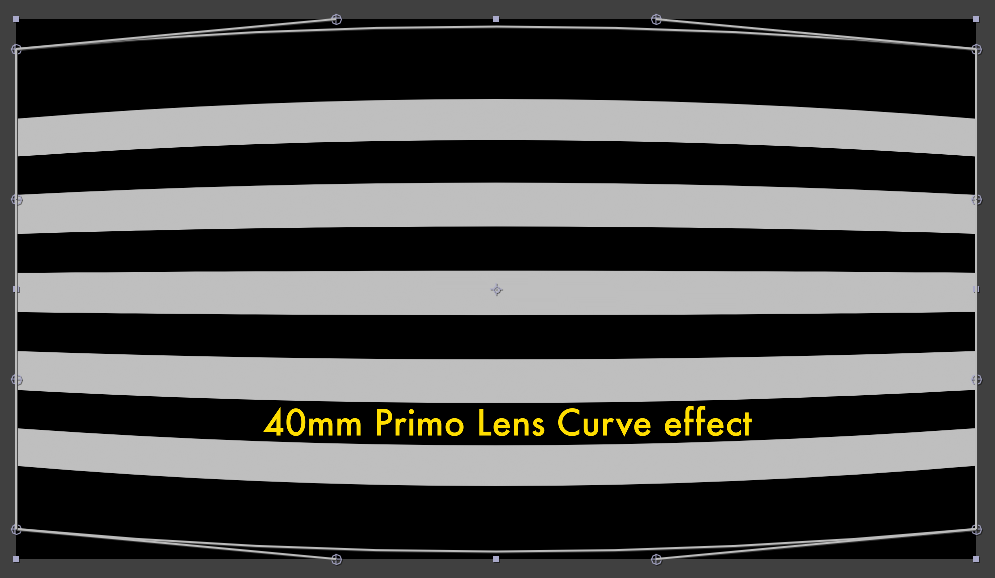
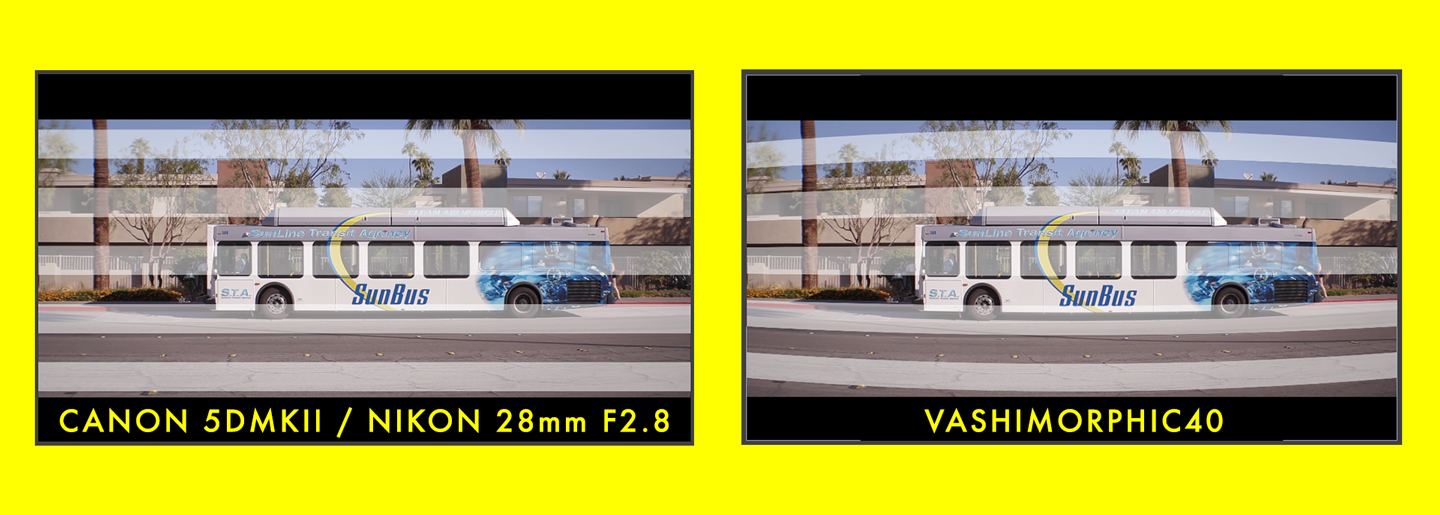
These two focal lengths split the difference between the two different FOVs (40mm/20mm) that the 40mm Panavision lens provides…and the settings in my project use matched curvature to further enhance the look. I used the Bezier Warp effect and adjusted the flat image until it matched the curved lines of the 40mm Panavision Anamorphic. I massaged the 12 control points in the Bezier Warp until I duplicated the exact curvature.
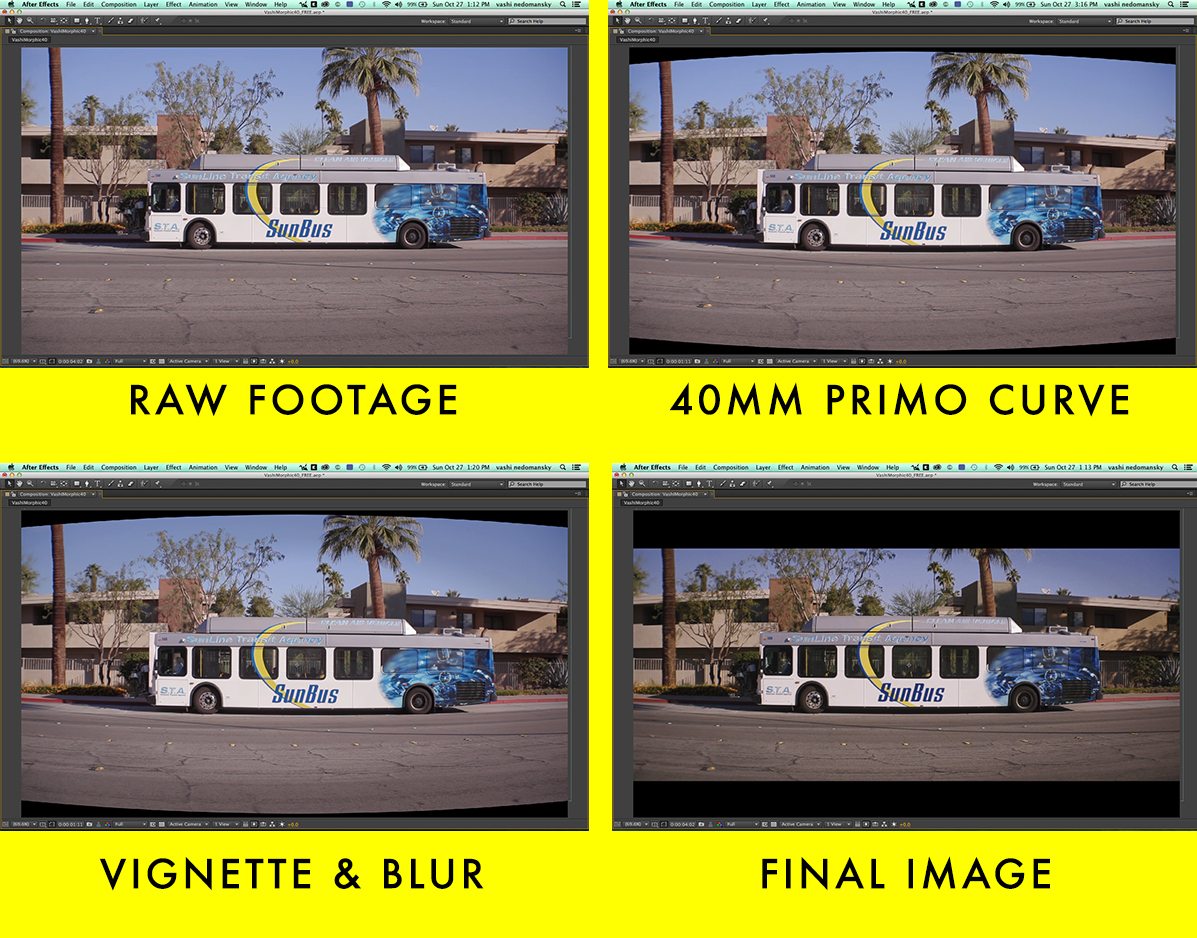
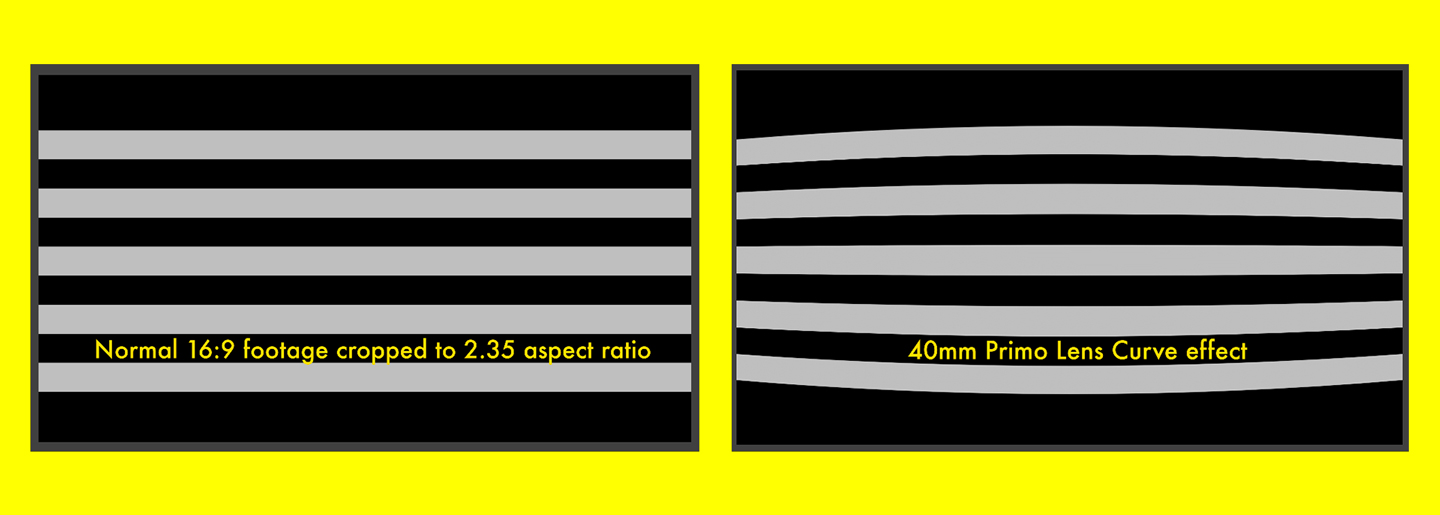
I tried optics compensation, lens distortion and various other methods but they all need resizing of the footage to fit the full 1920×1080 frame. I needed a better solution…so I did it by hand with the Bezier Warp so we could retain the sharpness of the raw footage. This first effect in the project is the 40mm Primo Curve. This matched curvature adds the subtle 3D quality that is prevalent in the Anamorphic format.
Straight lines are bowed at the top and bottom of the frame. This causes a perceived “bulge” in the middle of the frame…as if that section of the image is closer to the viewer. It is inherent to the Anamorphic format and now you can add it to your “flat” footage. The 40mm Primo Curve effect does the heavy lifting and gets you closer to the Anamorphic look.
I find the lens distortion is the most appealing aspect of the 40mm Panavision Primo Anamorphic lens. It’s not exactly barrel distortion and it’s not a fish-eye…it’s a more complex curvature and I find it very pleasing visually. It has a tell-tale bulge in the middle of the frame that protrudes out of the frame. This is what gives it a faux 3D “pop” that helps DPs and Directors to stage such dramatic shots.
Wes Anderson used the 40mm Primo almost exclusively on: Rushmore, The Royal Tenenbaums, The Life Aquatic with Steve Zissou and The Darjeeling Limited. The curvature is the heart of the VashiMorphic40 project. The vignette and corner blur options enable you to further replicate a “vintage” or stylized look.
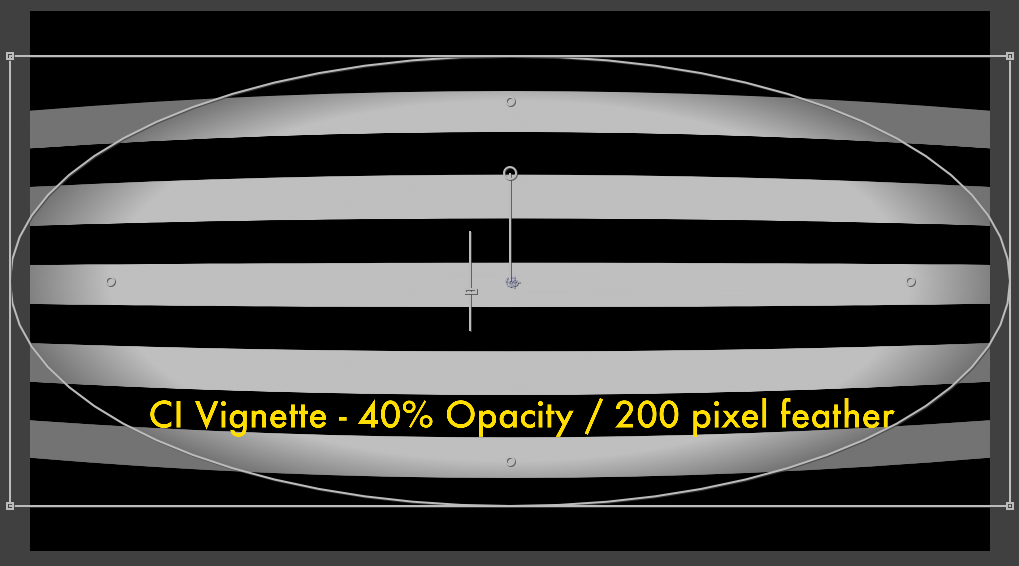
The second effect is the CI Vignette effect. It is a free plugin designed and graciously approved by Bart Walczak of Creative Impatience for this project. It installs in both After Effects and Premiere Pro and creates the gentle fall-off that many older lenses possess.
I have set up the effect to subtly darken the corners of the frame. You can further adjust this effect to taste. What this does is subtly add depth to the flat image. By darkening the edges…the center of the frame will be more prominent and so will your subject/object if it is positioned there. Not every lens has fall-off in the corners, but I feel it adds to the illusion and expands the perceived depth of the final image.
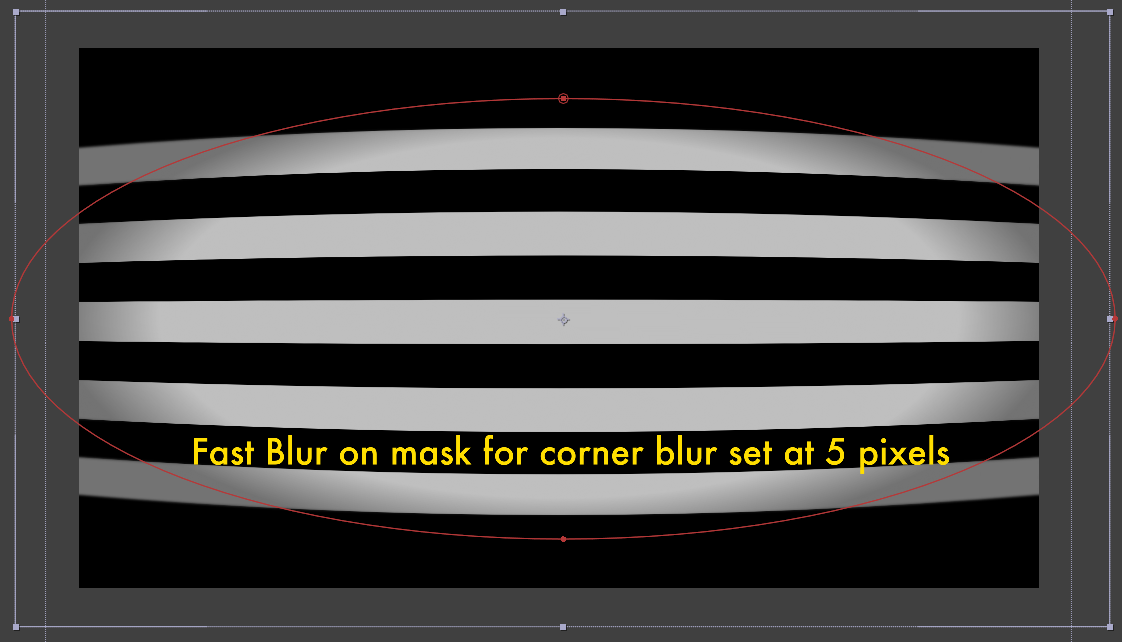
The third and last effect is Blurred Corners. Many older lenses, including Anamorphics, get very soft in all 4 corners. The focusing mechanisms of these lenses have to focus across two different focal lengths and the result is often soft corners. I created a mask that matches the areas affected after researching films and photos of this phenomenon. I used the Fast Blur effect so that rendering would be kept to a minimum.
My default setting of 3 pixels is visible, but subtle. The overall goal is to approximate and capture the sensation of the Anamorphic traits…something almost impossible with spherical lenses. For shooting stylistic or experimental footage it can really add that something special.
The VashiMorphic40 template also contains a 2.35 Anamorphic matte to replicate the projected aspect ratio of the 40mm Primo lens. When you shoot footage for this project…you must frame and shoot with the 2.35 ratio in mind. Please mark your screen or turn on 2.35 overlays on your screen/monitor so that everything you want in the shot falls within the 2.35 frame.
AFTER EFFECTS TEMPLATE PROJECT WORKFLOW:
1. VASHIMORPHIC is by default 1920×1080 / 23.976 FPS / 16:9 aspect ratio.
2. Use a full frame camera with a 28mm or 35mm lens.
APS-C camera use a 20mm or 24mm. BMCC use a 10mm or 12mm.
3. Capture your footage in 16:9 format and frame for 2.35 during the shoot.
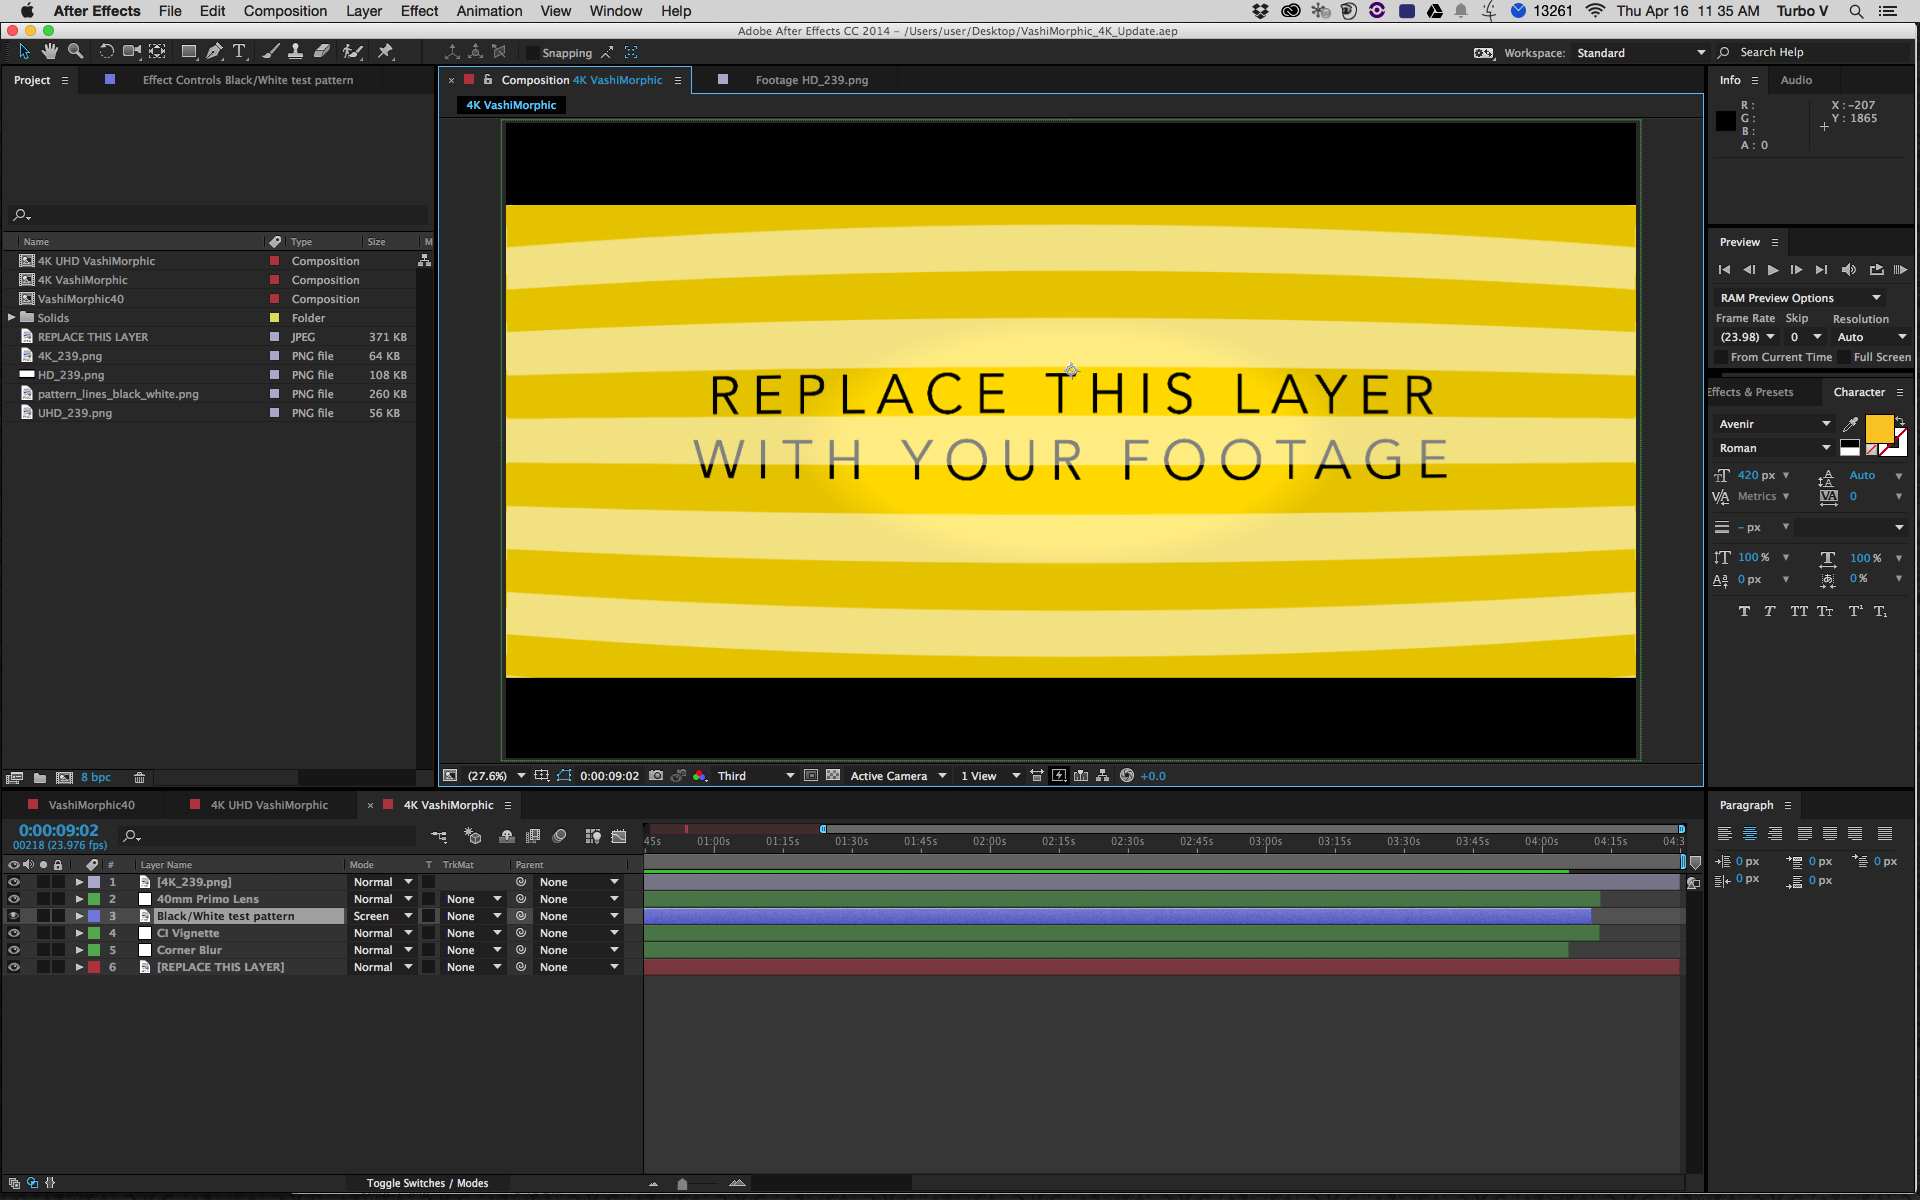
4. Import your footage into the “Your Footage” layer of After Effects.
5. Adjust CI Vignette settings to taste.
Default setting is 10% Opacity and 200 pixel feather.
6. Adjust Corner Blur to taste. Default is 3 pixels with repeat edges on.
7. Render out footage to the codec of your choice.
VashiMorphic will not replicate lens flares or the oblong out-of-focus areas like an actual Anamorphic lens. It will however…for the very first time…give you a free and easy way to morph your normal DSLR or other 16:9 footage into a convincing and controllable simulation of the Anamorphic look.
It is by no means perfect, but I spent a lot of time trying to find a way to duplicate the aesthetic of a filmmaking tool that I really love. I hope it will find a home in your filmmaking arsenal and give you the opportunity to enhance your footage and help you tell your story.
Please feel free to download the project and share this post. It is not for resale and I only ask that if you chose to repost this article…please give proper attribution to VashiVisuals.com
UPDATE #1: VashiMorphic40 for After Effects CS5.5
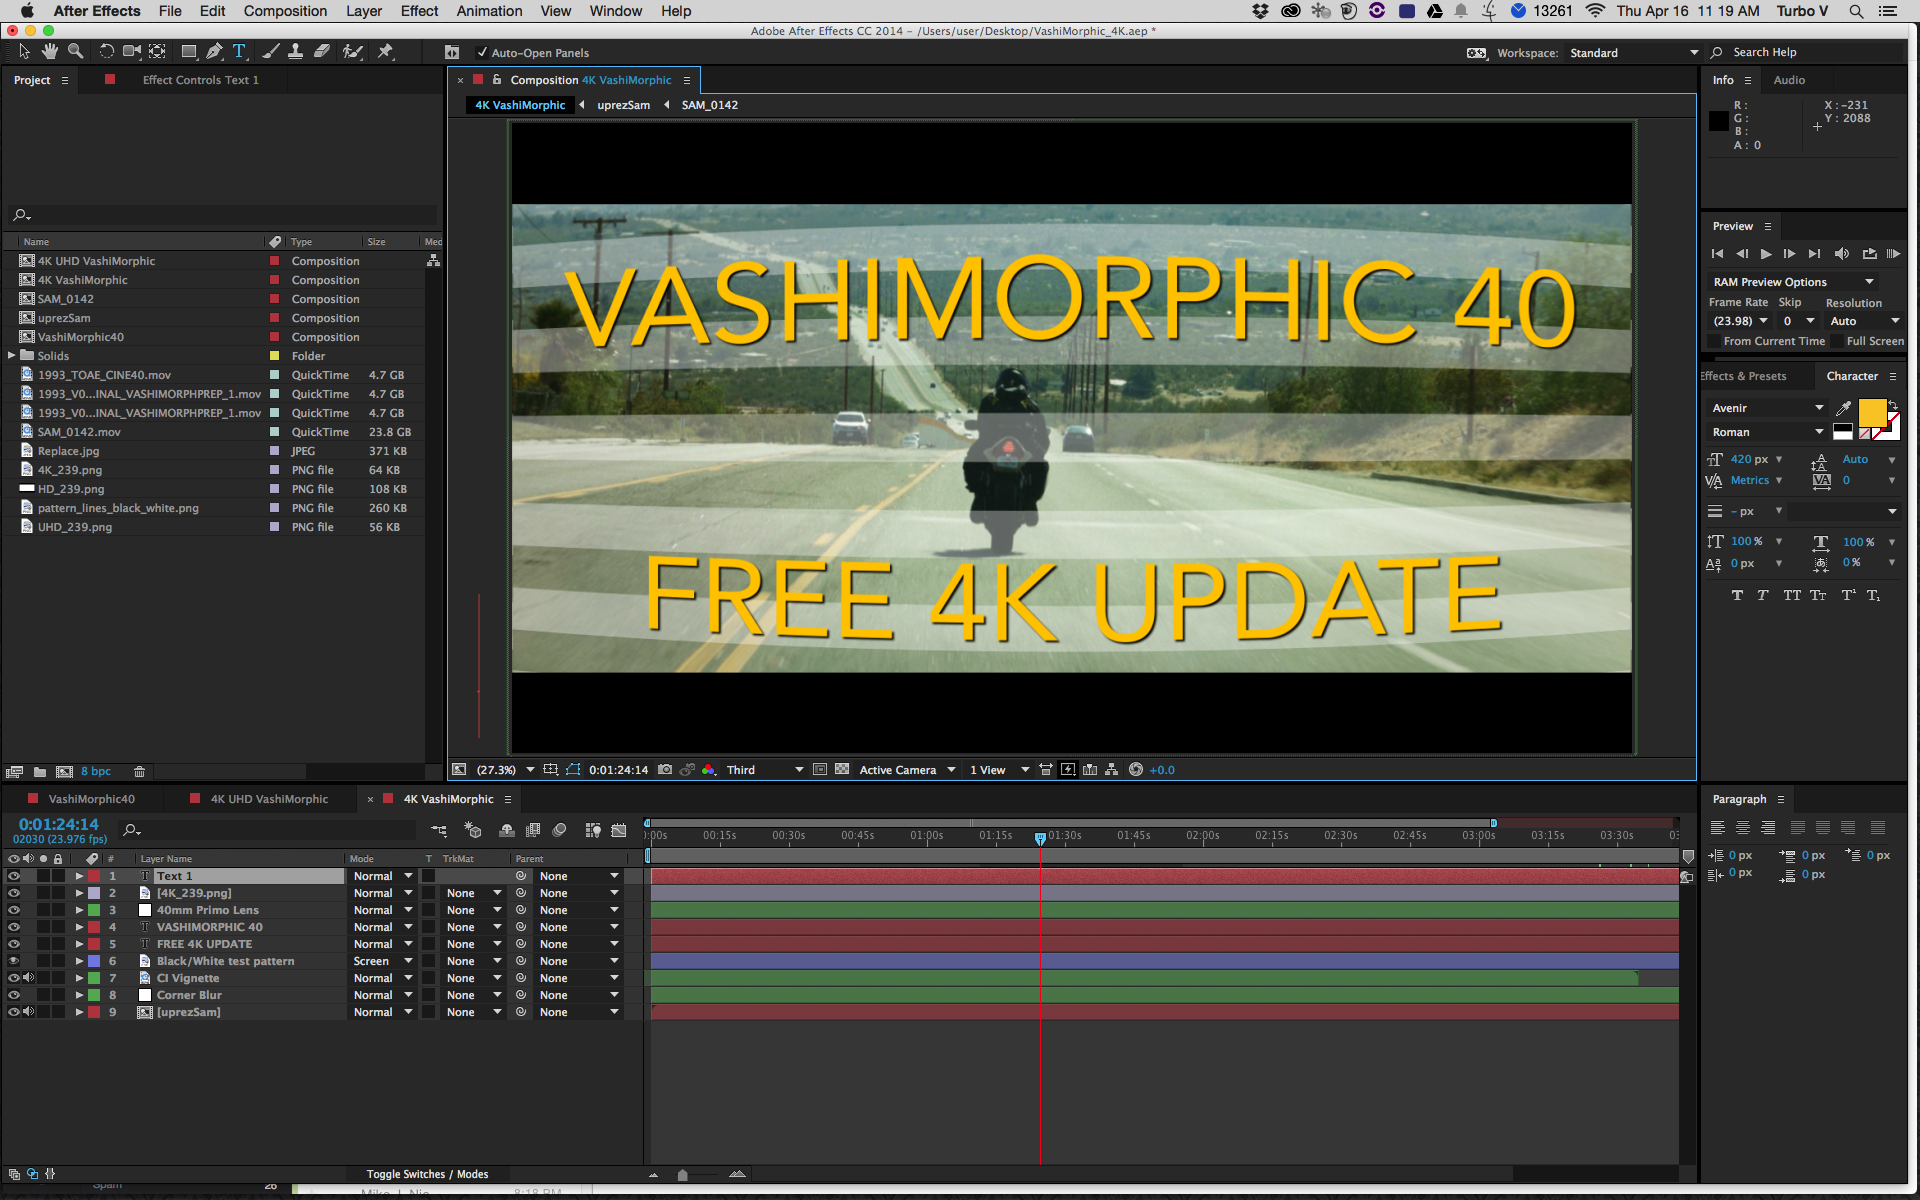
UPDATE #2: VASHIMORPHIC40 4K for After Effects CC
After the great response to the original VashiMorphic40…the big request has been if I can create a 4K version of this free After Effects project. So here it is!
The updated VashiMorphic40 4K has both UHD (3840 x 2160) and 4K (4096 x 2304) compositions and a layer ready for your footage. Both presets are 16:9 to match most camera sensors. I have also built a vignette layer into the project so you won’t have to download the CI Vignette plugin. Everything you need is in the After Effects CC project in the link below. Enjoy and share!
DOWNLOAD : VashiMorphic40 Free for After Effects CC
Thank you so very much and go shoot some footage!
For more information on low budget Anamorphic solutions and lens options:
4 Low Budget Lenses with Amazing Lens Flares
Andrew Reid’s Anamorphic Shooter’s Guide
The Cinemorph – Anamorphic Look Filter
The Ultimate Aspect Ratio Guide
Originally published October 28, 2013 and updated January 4, 2018.
Until next time…

There are 74 comments
Great plugin, thank you for doing this
Thanks for the kind words Iggy. Took some time to get it just right. I love those curved lines.
I’m with you man. That’s one of the most appealing things to me about anamorphic outside of flares and the beautiful scope it creates… those curved lines around edges just add that extra “oomph” to an image that completes the whole “CINEMATIC” look of an image. Your time crafting this plugin is greatly valued, I’ll be using it in future projects man!
I’m not sure if I like the curve look it reminds me of a fisheye look.
Red Giant has a beautiful plugin called FRAMES that gives you the look you’re looking for at a click of a button. Down the list you can choose Theatrical, Anamorphic 16:9 , Ultra (this one has a lot of black) takes to much of your screen. Some people likes it but I don’t.
Check it out: https://www.youtube.com/watch?v=gEh06h_TeaE
[…] If you would like to morph your footage from 16×9 into Anamorphic…I created VashiMorphic40 a FREE After Effects project for […]
Thanks Vashi, it looks great, sadly i don’t have a 20mm or 24 for my APS-C Camera (Canon T4i), but i’ll try using it with my Rokinon 35mm T.1.5 to see how it works.
(i also have a Tokina 11-16 f.2.8, Sigma 50mm f.1.4, Rokinon 85mm T.1.5 and Canon 70-200mm f.2.8…. just gotta get that Sigma 18-35mm f.1.8 so i can use your plugin properly, yes i have an excuse to buy it now :)) .
All the best from Chile!
I love that you don’t just say hey here is free stuff but instead write a little bit about the history and use of anamorphic lenses. I continue to learn a lot from your posts, keep up the education!
[…] VashiMorphic40 After Effects project that matches the 40mm Panavison Primo Anamorphic Lens […]
Thank you so much for this!!! I love it, especially because I am one of those “no no not at all having a budget” filmmakers!
[…] your images to resemble the aesthetic that anamorphic provides, Vashi Nedomansky of VashiVisuals is offering his After Effects plugin, VashiMorphic40, for the low, low price of free. Continue on for more details. (more…) […]
Thank you so much for this. I can’t wait to shoot an entire project with it in mind. Do you think it’s possible to modify the settings of the stretch for it work with longer lenses?
Do you have a compatible AE CS5 project file?
I can save/export a AE CS5.5 or XML of this project for you and email it to you? Will either help out?
Luckily it’s only the Bezier Warp with specific settings, CI Vignette free plugin, Fast Blur and a 2.35 widescreen matte.
Let me know…
Hi Vashi,
I too would love a CS5 version also if at all possible?!
Thanks in advance
Ian
Hi Ian…just emailed you a CS 5.5 and XML project for After Effects.
See if either works. I don’t have access to CS5 to save that version. The XML should work!
Hi Vashi,
If you could, I would like to receive the 5.5 project as well.
Thanks!
Douglas
Sending your way now Douglas!
I’m dying to try it with my 5d3 but the file was created in Window.
Hi Ed. Which file was created in Windows? The AE project was created on MAC…but was tested on both Windows and MAC.
Let me know what I can do to help you out.
Vashi
Great product! Fast and easy to use! Thanks!
I tried replacing the footage layer and the comp is still just black. whats the deal
Weird. 1500 downloads and no issues yet. You’re the first! Try dragging your footage under the Footage layer then ‘delete’ the pre-existing Footage layer?
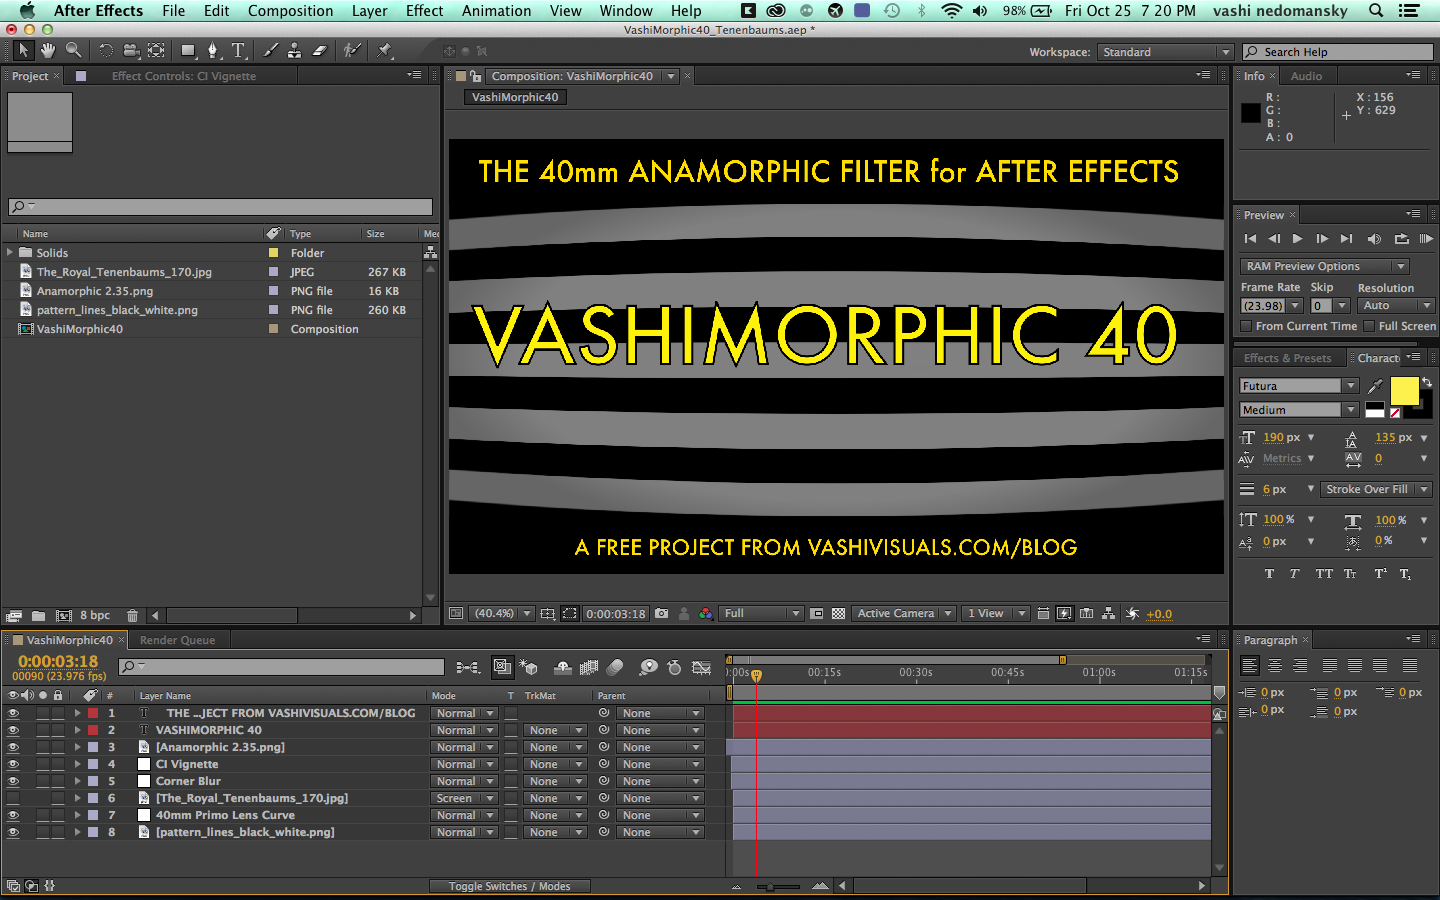
Turn off the black and white lined image that shows the curves too.
Let me know if that works for you. Thanks!
Same here! AE CC on OSX 10.9
Is it working alright for you Oli? Should be compatible with CC and Mavericks.
¿Anyone could upload a CS5.5 compatible version? Thanks a lot 🙂
I created a CS 5.5 version and just emailed you. Let me know how it works out!
Could you also send the cs5.5 version to me? Thanks alot in advance
Hi Mark…I added a new link to an After Effects CS5.5 version at the bottom of the article. Enjoy!
[…] without expense lens or adaptors? That’s the goal behind VashiVisuals free After Effects plugin, VashiMorphic40. Now you can recreate the unique anamorphic look (a look recently popularized by Wes Anderson – […]
Thanks for sharing Vashi! Keep up the good work!
It looks great from the demo, and it appears I’m the only idiot in the bunch, as I’m getting a message saying “This project contains 1 reference to a missing effect. Please install the following effect to restore this reference. (“CI Vignette”)
Any suggestions?
Thanks in advance.
You are no idiot! It’s a separate and free install. There is a link in my post to the free plugin ‘CI Vignette’ from Creative Impatience. It’s a bonus feature of VashiMorphic40 that is optional to add. The core of the plugin is the Lens Distortion that matches the 40mm Panavision Primo lens…and the vignette just gives you more possibilities. Hope that helps and enjoy the VashiMorphic40!
This is an amazing effect! I can’t wait to try it!
Hi Vashi,
I downloaded your plugin and tried opening the project file in CS 5.5 (Win) but i get an error dialog saying “this file was created in AA version 11.0.3 (macintosh 64) and can not be opened with this version”
Can you help please ?
Thanks in advance
Mick
The link for the CI Vignette is in the body of the post. Since it’s a free plugin from Creative Impatience…I needed to link to them as opposed to just include it in my project. Share the love!
Sorry Michael! Wrong answer to your question. I will email you a CS 5.5 version that should open properly. Let me know once you get it and fire it up. Thanks again!
The plugin looks great but I can’t use the Vignette. I keep getting missing: CI vignette every time I use the plugin. Did I install improperly or is there something else to download to get this to work?
The link for the CI Vignette is in the body of the post. Since it’s a free plugin from Creative Impatience…I needed to link to them as opposed to just include it in my project. Share the love! Let me know if you have any other questions…thanks!
Hi there,
may i ask you or a CS 5.5 file? A great site you have here.
Hi, same as above: any option for AFX CS5? (v.10.0).
I’ve tried it with a bezier warp but the results are not convincing, may be I miss something.
Very sharp. Thanks.
Will have a CS5 version shortly. I only have CS6 to make a CS5.5 version for those asking. Need someone to open in CS 5.5 and save it as a CS 5 version.
Well, after doing some tests with my Tamron 18-270 set at roughly 20mm I’m ditching my own method of simulating the anamorphic distortion. Why? well, the vashimorph is simpler, easier on the processing and produces better results. So kudos to Vashi.
The only thing I modified or did differently is that I skipped using the project after the first opening of it. I just took the vashimorph distortion and made a preset of it. I’m skipping the edge-blur and vignetting alltogether out of personal taste, and I know how to do that sufficiently to bother with it. Also, I prefer these extras to be modifiable on a per-shot basis so I can tailor where it is applied with masks.
Just wanted to tell you that I’m mightily pleased with the results!
Hi,
Could you send me a CS 5.5 Version please? This looks very good but it won’t open for me.
Thanks
Sending you a CS 5.5 version now! Enjoy!
Hi was wondering is it possible to make a full working VashiMorph40 after effect plugin that you need to instal and only corrects perspective and distortion so you don’t have to import every time. It would be the best.
Thanks,
Viktor
Open the effects-control panel Locate the Bezier Warp effect. Click and drag it to the Effects panel. Unclick. AE will then ask you to name it. And hey presto! A preset that shows up like all the other plugins 😉
Would love the CS 5.5 Version if possible. Thanks!
Hi Dillon! I update the post with a link to the CS5.5 project at the bottom of the article. Let me know that it works out for you. Enjoy!
Thanks for this!
After playing around with this a bit in AE I did some custom CropMarks for use with MagicLantern. They show all the pixels that will be shown in a straight application of the Vashimorphic40 preset. If someone’s interested, they’re on
https://drive.google.com/file/d/0B0TpEnIn9v7JT0VKV09fZUE2aVU/edit?usp=sharing
(The naming of the files were purely utilitarian. I haven’t talked this over with Vashi himself, I just needed a name on them that corresponded to when I would use them. I hope Vashi don’t mind 😉 )
and some thoughts on it: http://www.jmalmsten.com/2013/11/anamorphic-distortion-or-what-is.html
Hi does this file works with ae cs6? And can i use a 50mm 1.4 canon lens to get this efect? Thanks
Yes it will works with CS6. The 50mm 1.4 canon will work but because it has less distortion than a 35mm or 28mm it will have a slightly less curved look. You could add more curvature in post…but VashiMorphic40 will get you pretty close. Hope that helps!
Isn’t Vashimorphic40 compatible with AE CS4?
Any chance?
I created it for CS 5.5, 6 and CC. I need someone who owns CS5 to save it from 5.5 then someone with CS4 to save the CS5 version. I don’t have the old versions in-house to do the backward conversion saves. Let me know!
hi i have cs4 how would i convert the file to open for me?
I need someone with CS5 to save a CS4 version of VashiMorphic40 from their software. Each version saves for one previous version. I will look through my older MAC towers as well to see if I have a CS4 kicking around. Fingers crossed.
[…] ago I had posted about the VashiMorphic40 Adobe After Effects plug-in, which is freely available here. The creator of this plug-in, Vashi Nedomansky, writes: Films shot in the Anamorphic process are […]
.…
thanks!…
https://vimeo.com/81209746
Thak U Vashi 🙂
gashô
Thanks so much for this! Works awesomely. Been trying it out with a DIY bokeh and flare filter I made – http://www.khairilmbahar.com/post/71227411602/almost-anamorphic-part-2-lets-add-a-lil-flare
Thanks for sharing Khai! Really enjoyed your article. Great to have these inexpensive/free methods to approximate the anamorphic look. Happy Holidays!
Hi There Vashi, Thank you so much for this preset. Works great. Just one question, i’m working on a 720p project right now, do you know the best way to use this preset on that project?
Thank you
Happy Holidays
Thanks for the comment Francisco. I will look into making the adjustment…I would have to redo the curvature. Give me some time! Thanks again.
Hi Vashi,
This is an amazing resource, thanks for sharing it. Could I get a CS5 copy as well?
Thanks Rob for the kind words. I’m trying to get a copy of CS5.5 so I can save a CS5 version of the project. If you know someone who has 5.5 they can download that version from the post and save it as a CS5 version. I hope that helps!
Well, I tinkered around a bit with the preset, and got it to work resolution-independently (that is, it should produce the same curvature no matter the resolution of the layer it’s added to… assuming it’s 1.78:1 AR, of course ). If anyone’s interested, it’s at:
http://www.jmalmsten.com/2014/01/making-vashimorph-resolution-independent.html
Thanks Vashi! I’ve found I like using this plugin more than my clumsy anamorphic adapters. This is way easier to keep in focus!
I just did a video with the Vashimorphic used in most of the shots. In some shots the lens curve was too extreme, so I just disabled it.
http://youtu.be/5tNtHRFbzww
My glass was more tele than you recommend. I used a GH2 with lenses from 24mm to 38mm.
thank you very much for all of this!
[…] VashiMorphic40 – The FREE Anamorphic Lens Look After Effects Project […]
[…] Use VashiMorphic40 (it’s free and can be found here : https://vashivisuals.com/vashimorphic40-free-anamorphic-effects-project/ […]
[…] I downloaded the simple project file myself. Shot some footage with my Tamron 18-270mm lens set at roughly 20mm. Filming mostly myself in my […]
[…] your images to resemble the aesthetic that anamorphic provides, Vashi Nedomansky of VashiVisuals is offering his After Effects plugin, VashiMorphic40, for the low, low price of free. Continue on for more […]
Hi Vashi,
When I bring the plug-in into after effects, it reads:
‘This reference contains 1 reference to a missing effect. Please install the following effect to restore this reference. (“CI Vignette”)
I also can’t work out how to adjust the actual footage around the curved black bars.
Any help would be throughly appreciated.
Many Thanks,
Chris
[…] No Film School – Everything You Need to Know to Get Started Shooting Anamorphic – No Film School – Free Ultra High-Resolution Aspect Ratio Templates for Your Next 4K, […]